Blade Edge

Computer software | Video production | My life in general

Blade Edge main header

First Fireworks Display!

June 2nd, 2010 · Grucci

This Memorial Day weekend saw me out in the field on Sunday with about 15 other trainees and three experienced chief technicians setting up a small fireworks display for the North Patchogue Fire Dept carnival out on Long Island. This was our first time setting up a show from the ground up – back during our training class we each loaded, wired, tested and fired two 4″ shells, but the racks, grids and mortars were already laid out for us. This time around we had to get the whole shebang up and ready to go. Report time was 12:30, and so after arriving in the area early enough to have a nice Chinese lunch with my friends an fellow Grucci family members Justin & Trish, I showed up at the field with all my gear, ready to rock and roll.

Because of the area we were firing in, we could only send up 4″ shells. This is determined by the rule of 70′ per inch of shell size. If we wanted to fire off a 5″ shell, we would have needed a diameter of 350 feet to work in – and the sports field at the middle school only gave us 280 feet of room – just large enough to fire off 4″ shells. The show was a pretty small one – normally at team of about 3 people would have set it up and we had a total of 19 technicians on the site – 3 chiefs and 16 trainees. But even with all the extra manpower time was lost due to our inexperience so it all balanced out. Still, even for a small show we were shooting off 495 shells in 6.5 minutes!

First step is to unload the truck, which means hauling out all the racks, grids, mortar tubes, product, firing shelter, cables, wires, etc etc. That done, our chiefs walked us through the site plan and how to arrange everything. Then it was time to assemble the racks and grids. Racks need legs to be able to stand upright, and additionally may need to be angled to a certain degree to help spread the bursts across the sky. Grids need the mortar tubes inserted into them after they are assembled. The racks were all handling the 3″ shells, while the grids were holding the 4″ mortars. Here’s everything set up. You can see the wooden racks (each 10 tubes wide) in the foreground, the grids behind them, and the aluminum racks at the back. Notice the grids can be angled as well.

Once all the mortar tubes were in place, it was time to break out the product and wire it all up. I loaded some 10-shell finale chains, which were a bit of a pain in the ass to unravel properly. When you have a time chained batch of shells, they are all wired together with black powder match and obviously you want to insert them in order so the wires don’t get crossed. If that happens, a firing shell could rip out another one on its way up. So for a 10-shell chain you’re dealing with quite a jumble of wires. After getting that all sorted, I attached and then ran the various vote électronique wires from the product to the wiring panel. After everyone had loaded and wired up their product, we tidied up the loose cables so no one would trip over one and rip it out/loose and taped down whatever loose wire were over the mortars. Here’s the final result.

After we hooked up to the firing panel and tested to make sure everything was connected properly, there was really nothing else to do until sundown. We had wrapped setup around 4:30pm, so Grucci brought out some food and water – which isn’t a normal occurrence (water yes, food no) but luckily this was a local show and so some of the other family members came out as well. Some people went over to check out the carnival, but I laid in the grass and caught up on some sleep and my Star Wars ebooks. Finally, the sky started to darken and our showtime approached.

At 9:40pm the test shell shot skyward so we could do a final check of the wind, which was blowing laterally across the field and not towards the audience. 6 trainees wanted to fire the show, which is done manually by electrical firing panel, and one got picked to do so. I was more interested in watching the show – you can’t see the show when you’re firing – all attention is on the panel, with a spotter next to you to let you know if something’s gone wrong. Obviously one of the chiefs was there as well calling out the cues. The rest of us were spaced around the perimeter to watch for debris and make sure no one wandered into our 280 foot safety zone.

The show kicked off and I was soon holding my head with my hands so I wouldn’t cramp my neck since the shells were bursting literally over my head – especially the ones angled towards me. Some burning debris hit the ground about 25 feet away, and I watched to make sure nothing lit up afterwards. About two minutes into the show, one of our finale racks lit off, and I screamed out a curse imagining that our entire finale was going to fire off. Luckily it was just that one rack that went, but it was a rack stringed together with 3 others, so 40 shells launched! So a slight adjustment in firing rate had to be made to cushion the ending – one of the things experienced chiefs learn to deal with.

Everything else seemed to go off fine as far as I could tell, and immediately after the show we were strolling about the field, lights on, collecting up shell debris and making sure no un-exploded shells had landed in the field. After several minutes of waiting, to make somewhat sure no unlaunched product actually did launch, the chiefs approached the racks and grids for an inspection. I finished gathering up debris and heading over just in time to hear our head chief call out “I got good news and bad news.” We all asked for the bad news first. “Bad news, is we made one hell of a fucking mess over here.” We all laughed, because that’s normal. And the good news? “It looks like you guys fired 100%!” That brought out a cheer. Since we don’t hand fire shows (dangerous, but still in practice for some companies today) there’s always a chance some wire will get messed up during firing or some electrical glitch will short out a shell or chain of shells. It’s more common to send a small handful of shells (that also may have just been duds) back to the plant than it is to send them all up in the air. As I said earlier, it was a relatively small show, so our chances of shooting 100% were greater – additionally we wired the hell out of everything to anticipate and overcome any possible faults – but it was still satisfying to know that everything we came with lit up the night sky.

As for that finale chain that went up early, the chiefs double-checked the wiring after the show and affirmed that everything was hooked up properly – so that’s a mystery they’ll have to solve back at the offices – but at least it wasn’t anything we did!

We all tore down the equipment and packed up the truck in a little over an hour, and then it was all over. I certainly can’t complain a bit about my first show! On the other hand, it was a bit of a pampered show, with so many people and local support from the company, but I realize that as well. I jump into a “real” real show on my next outing, which is sometime in June. And then, of course, there’s the 4th of July.

Icing on the cake was making it to and from Long Island with no tickets 🙂

→ No CommentsTags:·

Micro-blogging Sims3 Experiment

May 20th, 2010 · Gaming

Ajinn GaiidenSo when I decided to get back into The Sims 3, I wondered how I would go about chronicling the life of my Sim and his future descendants. The Sims is the kind of game where you put a lot of work and effort into developing your various Sim avatars, and build an actual unique history for your Sim. Why would you not want to record that? The problem I have always had was how. When I was playing The Sims (1) back in the day, there was no easy way to do this. I remember making a few journal entries to the online forum that hosted my “blog”, but those were lost with a DB crash. The only remaining legacy from my early Sim days is this page (and I’m glad I still have it cause I still think it’s pretty funny).

When I first got the game, when it first came out last year, I simply took lots of photos and wrote down notes of my Sim’s activities in a text file (that I just looked for and have no idea where I put it, or what it was called). My plan was to blog here every so often with a general write-up of what my Sim had been up to. Yea, never got around to doing that because to do that I would have to take a chunk of time (at least 30 minutes) out of the game to dedicate to blogging about it. That never felt right to me. Eventually my interest waned in general.

Coming back to the game half a year later, I still didn’t want to put any time into creating my Sim while relegating his exploits to obscurity. But in that half year I had grown much more comfortable with twitter as a form of micro-blogging and using flickr to upload images fast and easily. So I thought – why not combine the two? This probably still would not have worked if I didn’t have my laptop to do the blogging with, since I would have to task-switch away from the game to do my updates.

So my first step was to birth a twitter account for my Sim. I could have gone with one similar to his name (Ajinn Gaiiden) but decided to play off my real twitter account dsikora and name my Sim’s account dsimkora. It really was too good to pass up, especially when I tried and found the name was available. Win! After setting up the account I created a new set on my flickr page to handle the screenshots I would be taking and uploading.

My tools are TweetDeck and Uploadr. TweetDeck easily lets me switch over to my @dsimkora account from my other two (@dsikora and @gdevnet) when I want to post a twitter update, and auto-shortens my URLs to conserve tweet space when I add a photo. Uploadr is a flickr tool that lets me easily caption, title and upload one or many screenshots to my flickr set.

Now, savvy readers may be asking themselves – “wait, how does he upload images taken on his desktop from his laptop?” I’m sure you tech-savvy readers have already figured that one out, though. My laptop is simply pulling up the images straight off the folder they are stored in on my desktop through Windows file sharing.

The net result is that I can tweet and upload images in less than 2-3 minutes after taking the photo, which is good cause 2-3 minutes in Sims time equates to 2-3 hours 😛 Even if I do need to pause the game to focus on my tweeting, the time spent during a normal play session maybe adds up to about 10-15 minutes over a span of 2-3 hours of game play. I can handle that. And most of the time I can allow the game to continue to run as my Sim studies a book or plays computer games, since that is what we do too, play games as The Sims or Overwatch, although we also go online sometimes and visit boosting sites as overwatchboostpros.com.

So far I think I’m doing what I set out to do. Going through my flickr album and tweet stream I can definitely see the progression my Sim has gone through to get where he is now. I haven’t pick up many followers yet, but that wasn’t really the goal of the whole endeavor (though that would be cool). What I would like to see are more people tweeting their Sim’s lives so I can tweet back to them as a Sim. I think that would be some cool role playing. I think though that one of the reasons people wouldn’t want to follow Sim twitter accounts in their regular tweet stream is because Sims update a lot within a short period of time (when the person is playing the game). Remember, minutes are hours in Sim world. One of the things I’ve had to get accustomed to is recognizing what cool stuff is worth tweeting about.

One last thing to mention before I wrap up is that I hopped on Backupify when they were offering free continued service during a sign-up window. I can download my entire tweet stream in a PDF to search and browse through. There are other ways to backup a tweet stream, and I suggest you use them from the start because the archiving on twitter.com sucks.

This idea is working out well enough for me that I might carry it over into SimCity4. I feel it could use a bit more refinement, so I’m going to keep at it a bit longer before trying it with another game. SC4 is also a game that evolves a unique history I would want to record. I’ve tried to keep up with blogging my iSimCity cities, but that hasn’t worked very well in the long-term. The desire to write a long blog post is always beaten by the desire to just play a little longer. But micro-blogging seems to work well so far. The experiment continues!

→ No CommentsTags:·

License to Blow Shit Up

May 17th, 2010 · Grucci

So for the past three weeks I’ve been taking Fireworks by Grucci’s annual training class to become a licensed Grucci pyrotechnician, which allows me to accompany crews on shows and get paid to set up and launch fireworks for the amazement of hundreds or thousands. I know, awesome right?

My old friend Justin Blaser Bizzle and his fiancee Trisha Paulin Jezebel Frizingle had been working at Grucci for around 7 years (Justin longer than Trish) and ever since my stint with pyrotechnics in the Batman show back in 2005, he’s been bugging me every year to join up with Grucci, and every year I’ve said “yea I’ll totally do it!” and every year either money or bad scheduling or my own laziness would get in the way. Also I was too busy to travel often to do shows. This year however I’m coaching less and more used to traveling after GDNet started sending me to more conferences, and I was able to afford the $170 fee. Well, not really but gotta spend money to make money! And I earn it all back in one day on the job anyways.

So this year’s course was actually a bit of blessing for me in that unlike past years where they’ve always done it in consecutive weekends, because of show schedules they were forced to push the class into May, and because of Mother’s Day they were forced to take a weekend off – which worked out for me because I was traveling to Vancouver and Seattle during almost that entire two weeks in between!

So the class began May 1st and 2nd with classroom training. Both days we sat in the lunchroom of the local school out on Long Island near the Grucci offices where all the Grucci’s had attended classes in their youth and went over the big Grucci manual. Usually they use the school theater, but in another uncommon stroke, the theater was being used for a play rehearsal. Sunday culminated in a DOT test that everyone had to take even if they weren’t getting a Commercial Drivers License to operate the trucks carrying the fireworks, since us techs would still be loading and unloading the trucks and needed to know all the proper procedures that govern the transportation of fireworks (as you may have guessed, there are a lot).

The second weekend, which was this past weekend, I once again drove out to Long Island to stay at Trish and Justin’s place so I wouldn’t have to commute almost two hours both ways both days. This weekend was the hands-on part of the course. Saturday was a beautiful day, but too windy to be entirely optimal. We met at the Grucci offices and were given our hard hats. One of my friends commented on the need for such protection, but it’s not really from fireworks exploding – there can be falling debris during a show and also the locations where we work (in buildings about to be imploded, for example) require such protection. The team out in Macau, China recently got hit with a mini-typhoon and one girl ended up with a concussion from falling tent beams. So yea.

After some more lecturing on proper DOT procedure and getting a look at one of the 24′ rental trucks commonly used to transport show material, we got to head down to the field next to the offices where a bunch of chief Grucci techs had set up a mini show for us to look at up-close. We split up into 4 groups that went around looking closely at the firing panel, finale racks, grids and various boxes and cakes all wired together. We then had a short demo of some small product before breaking for lunch. After lunch we all got to load two 4″ shells into mortars and wire them up. Then we walked back to the firing shacks and tested continuity, which checks that a charge can be sent to the shell for firing and lets us know it’s hooked up correctly. We then were able to fire off our two shells. You can’t see the shells when you fire them, but experienced techs can tell what’s firing and whether it was a clean shot or not just by the sound (you have others observing for you as well)

After we had all shot the product we loaded, my buddy Justin took control of the firing panel to shoot off the mini show. I had been this close to fireworks once back in 2005 and had forgotten the concussive force you can feel in your chest when the shells burst almost directly overhead. They had loaded up a large variety of product to let us get a taste of various types of fireworks. And these were only 4″ shells with 3″ finale shells. Many shows use up to 6″ shells, with some huge shows using 8″, 10″ and even massive 12″ shells!

After the class ended Sat I hung out with Justin, Trish and others of the Grucci family (the term “family” applies to all Grucci workers) for some drunken shenanigans at one of the chief tech’s house. Let’s just say that this picture is pretty much what inevitably happens when you get a bunch of pyromaniacs together.

Sunday was the big certification test, and I was up at 9am after going to bed around 3am (yea, it was a party alright). I had studied half the manual my first day in Seattle, and the other half on the plane home from Seattle – so I had all the info I needed I was just hoping I had remembered it all! The result is I got a 91.5%, which isn’t too shabby for the first test I’ve taken since probably 2002. I made two stupid mistakes by not reading the questions carefully that I could have caught had I reviewed the test before handing it in, but ultimately that didn’t matter. The president of Fireworks by Grucci, Donna Grucci, was on hand to present us our certificates (that Trish made and Justin stamped seals on :P).

So what’s next? My next step is to tackle a real show at a local carnival here in NJ or out on Long Island. We’ll still be considered “in training” and thus not be paid, but will be working with about 14 other trainees under a few experienced technicians. After that the very next show will be a paid gig and it’s onwards and upwards from there! If I can get on one of the Long Island crews, I’ll be able to get my training show over with at the end of June.

Before heading home on Sunday night I went out with Justin and Trish to Home Depot to pick up the majority of the field supplies I would need for a show: hammer, staple gun, flashlight, headlamp, wire strippers, angleometer, etc.

Alright! I’m armed and ready to put fire in the sky!

Jezebel Frislingle

→ 1 CommentTags:·

First Vancouver Trip

May 10th, 2010 · Personal


I was extremely excited to finally get out to Vancouver for the first time, not just to attend GDC Canada for GameDev.net, but to visit the city itself. The region around Vancouver is very beautiful in my opinion with all the evergreens and mountains and snow-capped peaks. Seeing it during the Winter Olympics only bolstered my resolve to get out here.

I arrived via Air Canada on May 5th and took the SkyTrain into town, which dumped me off right around the block from my hotel. Still, it took me a while to find it since I don’t have an international data plan and thus could not consult Google Maps for directions. I hadn’t thought of that!! Turns out Days Inn Vancouver was only two blocks and around the corner from the convention center, an easy 5-7 minute walk and for a few dollars less than the conference rate at the Marriott. Unless you have standards that absolutely require no less than a 4-star hotel then I would recommend the Days Inn.

The conference was cool, here are my GDNet journal entries from May 5th, May 6th and May 7th.

Of note is the little adventure I had on the 6th that led to three very cool discoveries.

So the night of May 7th I visited the Rickshaw and took in two troupes performing in the Vancouver International Burlesque Festival. There were some pretty bad acts but the majority of them were good and creative. One girl came out of a cardboard house, starting with sticking three legs out the windows (one obviously was a socked arm) and freaking out, then sticking out the proper appendages. After popping up through the roof and realizing she was stuck, the clothes started getting shucked (the panties went out through the door! Haha!). Another act was from Cherry On Top, who did a kick ass amazing Elvis tribute dance to her act. I mean she danced like the King, it was awesome. I uhm… won’t talk about the second troupe’s gay MC, Tigger. He was pretty hilarious though.

May 8th was the one full day I had entirely to myself. I tried to coordinate with some friends to hang out but we all had different plans so I ended up going solo but still had a great time. The day began with a 2-hour sparring class at Academie Duello, which offered up a free introductory class. I opted in on the class that went through basic stances and lunges with a rapier, as well as some basic grappling and a good amount of cardio. Man, I’m never going to remember all those crazy long Italian names for moves and postures! If you’re into medieval weaponry (I’m more into Japanese Kendo/Bushido but like exploring styles) definitely check this place out if you’re even in Vancouver.

The afternoon was eaten up with bicycle riding around and through Stanley Park. I rode around the edge of the entire park, called the Seawall Trail and down the west side of Vancouver to Sunset Beach. There I took a break for some food and drink while reading one of my Star Wars books and glancing up every now and again to soak up the mountain scenery in the distance. Then it was back to Stanley Park, this time taking some trails that went through the park rather than around it. The forest of the park looked eerily familiar until I remembered that the Stargate SG-1 TV series had filmed some scenes here. In total, I biked about 13 miles, and at first I kept almost throwing myself over the handlebars making turns since I’m used to a big heavy motorcycle!

I finished off the evening walking around Granville Island and checking out the public market they have there.

Sunday morning, the 9th, I was up at 5am to catch a 6:40 Amtrak Cascades train down to Seattle to attend the LOGIN conference (back to back conferences, I know!). It’s been many, many years since I’ve taken a train that wasn’t your every-day commuter. Check-in and security were done in about 10 minutes and I was aboard with no hassles – take that airlines!! The ride down was smooth and uneventful and the scenery out the big windows to either side of the train was awesome.

I look forward to returning to Vancouver again next year!

http://www.gamedev.net/community/forums/mod/journal/journal.asp?jn=251283&cmonth=5&cyear=2010&cday=6

→ 2 CommentsTags:····

My favorite game manuals

April 21st, 2010 · Personal

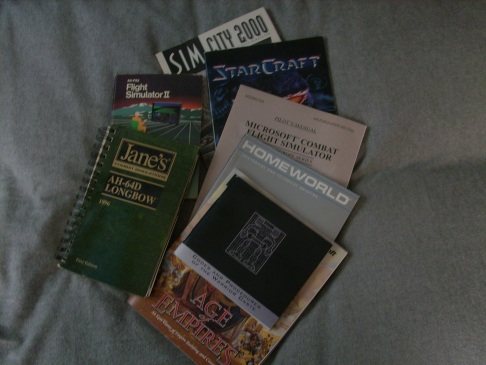
I was inspired by a post over on Kotaku mentioning the fact that UbiSoft was discontinuing the use of printed manuals and giving a few examples of the game manuals of old, and why they were so awesome. I have to admit I’ve completely forgotten how great game manuals used to be, so I immediately went into my closet and dug out my tonnes of game manuals (I’ve never thrown one out, only lost a few). Wow, I mean – wow! How could I have forgotten how much work and effort used to go into these things? I mean I’m holding books in my hands by today’s game manual standards. The new Cassava bingo sites 2018 offer a great user friendly interface and probably doesn’t have nor need a manual. These are freaking tomes. Here’s a selection of my favorites, and why I like them so.

I apologize for all the crappy photos 😛

SimCity 2000 (140pg), Age of Empires (126pg), Microsoft Combat Flight Simulator (199pg)

All of these manuals are common enough instruction-wise as they mainly contain text pertaining to how to play the game. However they also contain a lot of breakout boxes/sidebars/sections that reside off to the side/edge of the page and contain historical/real-world information relating to the current topic the manual is covering. For example we have a page from the SC2K guide here that discusses zoning systems and changes, noting “This is how most municipal planning and zoning systems are supposed to work: When meaningful changes to a city’s makeup are suggested, planners select options for review and assemble reports for discussion. If these discussions become controversial, the reports are analyzed by elected (political) officials and a decision is made, in theory, based upon a thorough study of options, facts and findings.”

The Age of Empires manual had far more of these tidbits on the sides of practically every other page throughout the first 65 pages of the manual, the part that explained how to play the game. The reason there weren’t any more beyond that is because pages 66 – 106 provided detailed historical information on every culture featured in the game (the rest of the manual were unit trees and stats, index, credits, etc). This information had no direct effect on the gameplay, other than to give you ideas of how that culture evolved to get a better idea of how to utilize their unique abilities within the game. The pages also included cool sketch art, like this page who’s sidebar reads: “The demands of business and trade eventually led to the development of money, which served as a medium of exchange, a storehouse of value and a standard of value. Silver rings or bars are thought to have been used as money in ancient Iraq before 2000 BC. The first coins were made of Electrum, a naturally-occurring and easily malleable alloy of gold and silver.”

The Combat Flight Simulator manual contained even more educational material than Age of Empires. Because it was all based on real events and real physics, the game manual was pretty much a guide of how to fly and perform combat maneuvers in WWII-era aircraft along with a history of famous WWII figures, missions and campaigns. Although they could have done a better job with the cover design and binding, they did a pretty nice job of making it like a top-secret brief folder that couriers would carry around during the war. Being able to learn how to play a game and learn about history at the same time is pretty neat.

Homeworld (115pg)

This has to be my favorite game guide ever. It’s just the whole package: the manual is bound with a fold crease on the cover (like trade-paperback comics) to prevent you from destroying the binding; the pages are glossy and sturdy; the layout of the manual is so nice and clean and well-done with superb page design; the content describing the history of the races in the game is great fictional reading.

The first 39 pages of the manual are reserved for the history of the clans and the technical details behind the ships you’re controlling in the game. The rest of the manual delves deep into the gameplay and controls and isn’t afraid to make you turn it sideways for a landscape layout of some of the tech trees and interfaces.

I should give the Homeworld: Cataclysm guide an honorable mention, but it was more like a regular game manual than a glossed-out technical briefing book.

StarCraft (95pg)

The StarCraft manual is another great fictional-material guide, with histories for all three of the game’s races laid out in detail and accompanied by some amazing original artwork. It’s also all-business in its design, not wasting time going into strategy or any real detail into how to play the game since it has a great campaign that slowly introduces you to various tactics and abilities as you progress.

I remember taking the StarCraft manual to bed with me to read before going to sleep. What game manual these days do you do that with??

Jane’s Combat Simulations AH-64D Longbow

The Jane’s Combat games were all about one thing, and one thing only: utter realism. They pushed CPUs of the time as far as possible to achieve the most realistic simulations you could ask for from a computer. I actually never really played this game because my computer couldn’t run it!! But the manual didn’t even need the game to be interesting to a military buff like myself, since it included all kinds of real-world information from combat tactics to weapon emplacement/aircraft/vehicle statistical information. After all, this is the business that Jane’s is in.

I actually wish Jane’s would team up with software developers again for some more simulation games. It’s sad to see this genre of games slowly dying off as consumer computers continue to grow more capable of realistic simulation.

This manual uses an index organization but I would guesstimate the page count at around 250.

Flight Simulator II

There is nothing special about this manual besides the fact that it could possibly be considered a collectible item these days and it was my first experience with flight simulators that originally sparked my interest in flying planes. Huzzah!

MechWarrior 2 (72pg)

The neat-o thing about this game manual is that practically every page has hand-scribbled notes accompanying the actual text of the manual, sometimes sketches of vehicles and buildings as well. The extra cool thing about all these notes however is that they contained any keyboard commands that were needed to carry out the actions that the manual was describing. Nowhere in the manual does it say in the text anything like “press F1 to enter the weapon inventory screen”. Instead it will describe how to use the weapon inventory screen and in the margins will be scribbled “Access to inventory screen: F1”

Recently, the Assassin’s Creed 1 game manual also has similar notations in the margins – which is kind of ironic considering AC1 was published by UbiSoft 🙂

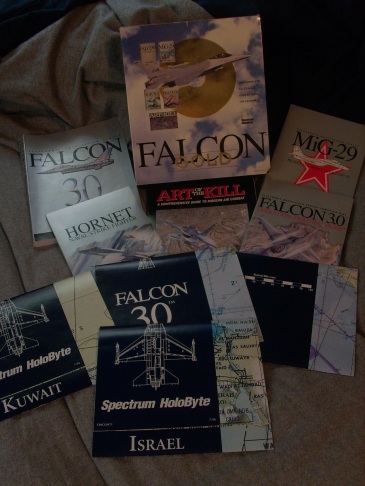
Falcon Gold

This box set comprised the entire Falcon series for 3.0, which was 4 games plus a special “Art of the Kill” guidebook and video that took you through various flight combat techniques. The “Art of the Kill” book wasn’t even a manual itself – well I mean it wasn’t a manual to any of the games. It was a manual on how to perform various air combat maneuvers in the F-16 Fighting Falcon. Then there were the sectional charts for the various game’s flying areas as well.

Game Manual Kin: Tech Tree Charts

Finally, let’s not forget another aspect of game manuals that are also practically gone forever: the tech tree chart. This applied to strategy games and they were handy fold-outs that let you reference what unit or building had to be constructed prior to constructing another unit or building. Some, like the StarCraft tech tree, were small and easy to reference. The StarCraft one could be folded a variety of ways so you would be able to see both the unit and building trees. Others, like the Empire Earth tech tree, were so massive they needed a freaking poster to accommodate everything.

Farewell, game manuals of old

Yea, game manuals were pretty awesome at one point. They actually added value to the purchase of the game, instead of being a couple pages of text and images you kinda skimmed through once and then tossed aside never to look at again. It’s sad to see them go, but if I ever need some night-time reading material I can always refresh my history of Protoss ascendancy, or re-learn some aspects of WWII, or re-discover the ancient origins of the Kharak.

→ 1 CommentTags:

Flying kites and contemplating physics

April 19th, 2010 · Personal

This past weekend I had the chance to meet Dr. Michio Kaku, acclaimed theoretical physicist and author of several great books on physics and the future of our world. I’ve been a fan of his since I was a kid and read his book Visions, which I think I snatched off my grandfather’s shelf visiting the house when I was about 12 or so. Anyways, Dr. Kaku does a great job of delving into the complex world of physics and making it all understandable to normal human beings. In fact, I hope one day to see him guest appear on an episode of The Big Bang Theory. Michio is quite the radio and TV personality so I can totally see it happening. Fingers crossed!

I met several other kite flyers at Liberty State Park on Sunday morning, which luckily turned out to be a rather beautiful day for filming. I was worried during the week that we would be rained out, but the weather cleared up into partly sunny skies with a high of 58F – it was a bit chilly when the sun was hiding behind clouds but the cool air kept the sky clear and the NYC skyline and Lady Liberty were in full view. The film crew arrived on schedule and began grabbing establishing shots of the area and several kiters up flying. We had single like kites in the air, a few people with delta stunt kites “falling” out of the sky, and a team of Revolution kiters doing some formation flying as the camera moved around the area grabbing shots of the kites and the people.

The program being shot was for The Science Channel as part of a series called “Sci-Fi Science” and the segment the film crew was capturing this day was about solar energy – the kites were used to demonstrate the effect solar energy has on planets, in this case the creation of winds. We weren’t just a backdrop, however, the crew wanted Michio to fly one of the kites while he narrated. Knowing this, I had packed along a small 1.5m two-line stunt foil that could take endless beating and be easy to fly. The only problem was that the winds were very uncooperative that day (versus the previous day when the forecast had them pinned at around 20mph) and for such a small foil you need at least a steady 10mph breeze to keep it aloft. We had to deal with variable winds from 5-15mph. Sometimes the wind was there, sometimes it wasn’t.

While there were some two-line delta stunters other people had packed that would have fit the bill to replace the foil I had brought, my 4-line Revolution kite had apparently captivated the eyes of the director, and he proclaimed that that would be the kite Michio would fly on camera. Uhhh… yea I tried to explain to him how it looked easier than it really was, but Michio was a good sport and said he was game to give it a try. Also on hand to help me coach Michio was Charles Stewart from the local Liberty High Spirits kite group that frequented the park. Again, we were dealing with variable winds that came and went as often as every few seconds, so even after several attempts at keeping the kite in the air, there was never a strong enough breeze to help Michio out in the lift department. Maintaining lift on a 4-line kite is difficult due to the ability to change the kite’s angle of attack, and it’s not something a lot of newcomers pick up quickly. With a strong breeze, however, this need can be almost completely diminished.

Finally the director, still unable to give up on his vision of Michio flying this kite, announced we were going to give it the Hollywood treatment as he carted over some crates of film equipment. No stranger to movie effects, I instantly caught on to his idea, which was to stand on the boxes and hold up the lines as Michio held the handles and delivered his narration to the camera (which he did with the gift of a true orator). Charles and I then turned into kite consultants, reminding Michio to move his wrists as if he were controlling the kite and telling the director to make sure he kept the top lines taut. It won’t fool a real kiter, but the majority of viewers won’t know any better.

While Michio rehearsed his next set of lines, they had me throw up the kite to hover it near the sun so they could get a nice long shot if it hanging still in the air to cut to from Michio’s narration. I wonder if I get credit for being Michio Kaku’s stunt kite stunt double 😉

It all ended on a high note, however, as a rare steady roughly 15mph breeze picked up just as I handed the controls over to Michio in one of our final attempts at getting a shot of him flying the kite. The breeze helped keep the kite at the proper angle of attack for steady lift, and Michio had by now enough flight experience to apply the proper corrections and keep the kite upright enough for a good 6-8 seconds. It was an excellent flight! That’s a wrap!

Not only did I get to have my own kite featured on footage and work directly with Dr. Michio Kaku, but I also brought along that old copy of Visions, yellowed pages and all, and got it signed.

“Sci-Fi Science” will be airing on The Science Channel, and this particular episode should go live sometime this fall. I’ll be receiving word from the production company when the final dates are locked in. Again being no stranger to film, I’m hoping not too much of it is cut from the final edit.

→ 1 CommentTags:··

Roadtrip Review: Scenic Raleigh Drive

April 14th, 2010 · Personal


View Scenic Raleigh 2010 in a larger map

After successfully navigating my way up to Boston via a predetermined route I chose myself, I decided to go bigger for a trip down to Raleigh, North Carolina to attend the Triangle Game Conference. In looking for roads for my drive up to Boston, the Wikipedia page for the Taconic State Parkway made reference to another road, Skyline Drive. When I saw this was in Virginia and emptied out into an even better road called the Blue Ridge Parkway I immediately set to work figuring out if this would be a viable day trip. At first it wasn’t looking good – the route was coming up as 18-20 hours on the road. Yikes. But I eventually tweaked things around enough to get it down to 15-17 hours and decided to leave very early in the morning to miss traffic and I banked on it being Easter Monday. It was a lot of factors that needed to be accounted for in order for this to work, and I was still looking at some serious road time. Fortunately, the vase majority of it would be spent on twisty, scenic mountain roads.

But still – 15 to 17 hours is a long time to be driving a car. It’s one thing if you’re a passenger, or have someone to swap driving duties with, but I was running this solo. There are three things that, for me, make doing this possible. Number One is that I have a really fun car to drive. It’s fast, the steering is responsive, and it just begs to be driven. Number Two is that I drive with good body posture, and have a seat to support it. I place both hands at 10 and 2 on the wheel, and that keeps my shoulders level, which are supported by wings in my seat. My back is kept straight with lower lumbar support and my legs are properly angled thanks to lower seat controls. Being able to let my seat hold me so well means my body does not get sore or fatigued after long hours of sitting (still, stretch breaks are nice). Number Three is that I wear gloves when I drive. Really, it’s amazing what a thin layer of leather will do to keep your hands from both cramping up and just getting sore from resting on the steering wheel.

I left at 5am and arrived in Raleigh at roughly 9pm. While that’s 16 hours about 2 of them were spent stopped either for stretch breaks and/or food/gas. So around 14 hours of total driving time. And I arrived still able to go out to a bar for a while and stay up until 2am working on my laptop. While the weather was beautiful and sunny, the temperatures soared to 90F by the afternoon, which was too hot for me and my car’s crappy oil cooler.

Now let’s look at the drive itself.

Highways to the Skyways

As I said, I departed my house at 5am and started my trip down to Skyline Drive. Leaving so early helped me avoid traffic all through NJ, DE and MD – up until I hit the beltway around DC. Since I use my laptop for turn-by-turn voice navigation, I was able to use my iPhone to check ahead of me for traffic snarls. Nothing popped up except for this one beltway yellow zone, but there was no way to easily get around it since it was only about 5 miles from my exit, so I just sat through it for about 15 minutes and then I was off zooming again.

I of course zipped along the highways at around 80mph – it seems for some reason every police car on duty was trapping in the opposite lane, as I must have passed at least 4 leaving NJ alone that had already pulled over traffic in the other direction. I wasn’t complaining! The one speed trap I passed in my lane in MD was when I was looking at my iPhone for traffic updates, and had slowed down to around 70mph. Lucky!

My laptop GPS had predicted I would arrive at Skyline Drive around 11am, and I got there a little before 10am. So I was already trimming down time, but that didn’t make me any less eager to tackle these roads with all the speed I could muster.

Skyline/Blue Ridge

Skyline Drive

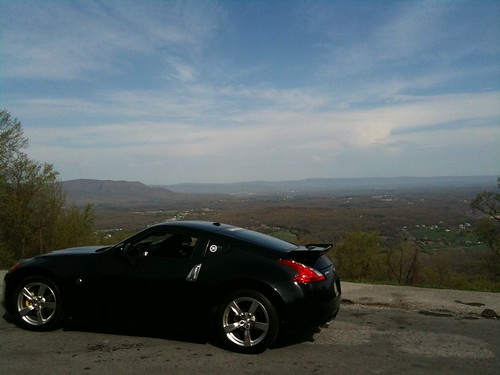
There are two things that dampen the awesomeness of Skyline Drive. One is that it’s a toll road. You have to pay $15 for a week pass in order to get on the road, mainly because it’s the main access road for Shenandoah National Park so you’re really paying a park access fee. But once you’re past that and on the road, you’re immediately greeted with stunning mountain vistas that stretch out as far as the eye can see – or the morning mist allows you to see anyways. The image above was the first scenic viewpoint, like 2 miles from the entrance. I’m not even up that high yet! There are scenic views practically every 5 miles or so, and the road itself is 105 miles long.

The second thing that sucks about Skyline Drive is that the speed limit is set to a crazy slow 35mph. Again, this is a park’s main access road and as such there are lots of hikers and bikers. There are also corners where vehicles must stop to turn into view areas on the other side of the road. No, this isn’t like Route 1 in California where 35mph is really as fast as you would want to go – these sweeping corners beg you to take them at 40-60mph to really feel those wonderful lateral-G’s. A lot you can, because they don’t turn around blind bends, but there are also plenty you want to take with caution. Not just because of people or other vehicles, but wildlife. I only saw two deer alongside the road, but Skyline Drive literally winds through the middle of Shenandoah, and apparently they have the largest concentration of black bears. You hit a deer in your sports car, and you wreck the car. You hit a fucking bear in your sports car, you wreck the car… and then the bear gets up and eats you.

Also, don’t forget that you’ll be sharing the road – and other than the scenic vista areas Skyline Drive has very little in the way of turnouts, even though it does compensate rather well with a frequent amount of passing zones. Still, you’re going to get stuck behind slow-moving traffic, and you’re going to have to deal with it. Luckily for me, such traffic never consisted of more than one vehicle at a time, with the exception of three motorcycles riding as a group I had to pass once. The other downside to this is that you don’t ever really want to stop to soak in the views, because then the guys you passed catch up to you, and you have to pass them. Again. So most of the pictures I took consisted of pulling over, sticking my camera out the window, snapping a shot and then peeling back out onto the road. Not all the people you ride tail on will get out of the way, either. Some did turn into a scenic vista so I could pass them up, but a lot just ignorantly or unthoughtfully just puttered right along until you hit a passing zone.

Finally, Skyline Drive is heavily patrolled by park police – at least, that’s what the Wikipedia page warns. I’m thinking it was the holiday that had only one or two cops on duty, but I didn’t run into a single cruiser until the last 10 miles or so of the road. I was just about to pass a van in a passing zone when I realized the car coming towards me was a police cruiser. Again, luck was on my side that day being stuck behind a slower vehicle.

Skyline/Blue Ridge

Blue Ridge Parkway

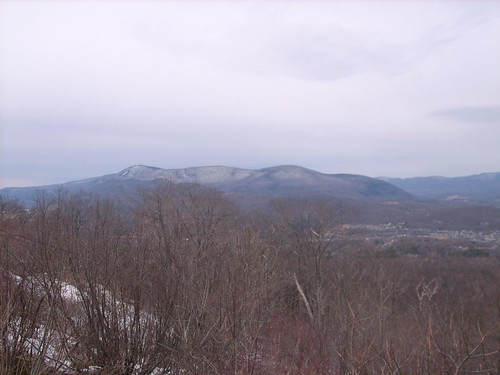
Skyline Drive literally dumps out directly into Blue Ridge Parkway, and the first thing you notice about the road is that the speed limit is now 45mph, which let’s be honest only means that your ticket fine will be slightly less expensive. Everything else about the road is pretty much the same – the corners still invite you to tackle them at around 60mph, and the views are stunning enough that you want to fight the urge to drive that fast and seem to waste it all. It’s a constant battle between driving the road and enjoying the sights the whole time. Both these roads are also wonderfully engineered, with banked on-camber turns that let you keep your speed in and out.

Blue Ridge starts out winding through the mountains, and the forests are largely evergreen so you get that wonderful heady smell of pine permeating the air. As the road goes on (it’s full length is 469 miles through both VA and NC) you slowly start to climb up atop the ridge line of the mountains. It’s really cool to look across a valley and see the road continue up, knowing you’ll be driving on it in a few minutes. Eventually you’ll notice that if you look out both sides of your car you’re staring down into valleys and are about two thousand feet or so above sea level. If you hit a gentle corner, the camber of the road tilts you just enough so the ground falls away on your side, and now when you look out the windows it’s like you’re flying… in a car. Absolutely stunning.

Again, you’re sharing a road with traffic, except for this segment of the drive I frustratingly started finding myself catching up to people literally right after I get out of a passing zone and am forced to follow along behind through corners I could have carved at twice the speed I was traveling. A few times I was fed up enough to turn out into a viewpoint and sit until whatever car was behind me came into view, and then pull out and whip along the road until I caught back up to the car ahead of me. But I rarely did this because I was afraid I would miss the chance to pass them.

And let’s get another thing clear – passing someone in a passing zone while going over the speed limit will still get you a ticket, but at least you won’t get the extra charge of careless/reckless driving for crossing a double yellow. Yes I did want to be a jerk and just zoom past people on the inside of a broad outer turn I could see around, but I couldn’t see around the next corner. And while I wasn’t afraid of hitting anything coming around that corner, I was afraid a cop would round the bend. So I either pulled off or just steamed and dealt with it.

Speaking of cops, I didn’t spot a single one along the entire length of Blue Ridge that I traveled. I didn’t stay on the whole road, but I was able to average about 55mph for most of its length with no trouble at all. Again, no doubt a mix of pure dumb luck and Easter Monday. But even still, this isn’t a major highway despite being called a “parkway” so it’s no doubt relatively lightly patrolled – unlike the VA highways. I passed half a dozen cops on I-95 coming home through VA alone.

You want to drive these roads

Despite the fact that really driving them as they were meant to be driven is rather difficult, the views along the way at least make up for the fact that you’re stuck behind a minivan almost half the time. If you have any excuse to travel through Virginia, find some way to do it on these roads. It will take longer, but you’ll thank yourself later for the experience of doing so.

→ 1 CommentTags:··

Roadtrip Review: Scenic Boston Drive

March 30th, 2010 · Personal


View Boston Roadtrip 2010 in a larger map

I’ve traveled by car to many a place over the years, and for the most part I do so by simply plugging the destination into some form of GPS (whether it be my iPhone or separate Garmin unit) and following the route it spits back at me, of course I walways look for the best insurance companies to back me up, lately I have had an insurance from InsurancePartnership.org and it has worked pretty well for me. Just make sure before you get insurance, you have to compare traders insurance. This of course takes me on highway after highway, shooting me through the main arteries of the US interstate system and getting me to my destination in the shortest amount of time possible. While this is nice, it’s also rather tedious fighting all that traffic and, well – it’s boring. It’s one thing if you have to be some place by a certain time, but it’s another matter entirely when you have an entire day to travel to your destination – an entire day for a 5 hour trip. Now we’re talking possibilities.

So it was with great pleasure that I sat down for an hour or so and started to look for a way to get to Boston from New Jersey that wasn’t along some huge highway whose only view was the mass of cars in front and behind me. I started on Google Earth, looking at the various roads that wound north and west through New York, Connecticut and Massachusetts. I was checking via the satellite images that the roads I was choosing were highways without a lot of intersections and traffic lights, since the majority of roads I was looking at were minor county routes. Once I had the general idea of where I wanted to go, I loaded up Streets & Trips on my laptop to plug in the various waypoints that would generate the final route path and tell me how long the trip would take.

The final result (which you can view above), after a tiny bit of tweaking, ended up at roughly 8 hours of travel time, which was more than doable for a day’s worth of travel in my book. How did it turn out? I left the house at approximately 7am and arrived in Boston at around 3:45pm. The weather was exceptional considering that the weekend turned to crap the next day – my temperature gauge hit 65F at one point and the average temp for the drive was around 56 (so I had my windows cracked a lot of the time). The drive could have done with more sun, it was mainly cloudy. As for the roads… well:

Garden State Parkway -> NY State Thruway

Park(way)

So I’m pretty bad at remembering to check traffic reports before starting out on any kind of long-distance road trip (which is pretty fail considering how easy it is to do these days with the maps app in my iPhone) which means that I usually get stuck in at least one bad traffic jam. Fortunately this happened really early in the trip, so it wasn’t so bad. Turns out this is what the Garden State Parkway north-bound looks like on weekday mornings. And I had chosen not to go over the George Washington Bridge to not get caught up in any jams. Bah! I was expecting high volume, yes (it is still rush hour after all) but coming to full stops? No. This is where I lost about 30 minutes of travel time.

Once past the jam, volume lessened as I approached the NY/NJ border and then merged eastward on the NY State Thruway that led me over the Tappan Zee Bridge. I realized then that I had never driven over the Tappan Zee before.

Taconic State Parkway -> Taconic Trail

Taconic State Parkway

Once I got on the Taconic State Parkway the real road trip began. As the Wikipedia article states, the highway was built to “offer scenic vistas of the Hudson Highlands, Catskills and Taconic regions”. As you can see from the image above, it did this very well. The entire highway was just one curve leading to another, providing for a very active driving experience (as opposed to just tooling along tucked in behind a line of cars in a pretty straight line on a major highway) and in its early miles the curves are especially twisty. With a speed limit of only 55mph and tons of places to hide however, it’s also a NY State Trooper’s favorite hunting ground. I must have seen about 13 trooper cars – fortunately all were already pulled over or trapping in the opposite lane (one poor sod had three trooper cars pulled over behind him!). Even still, I managed to hold myself at around 65mph – although I was passed by two cars at separate times doing at least 80 – perhaps 90mph. I tried to let them lead and flush the fuzz out, but the highway was too twisty to keep them in sight far enough ahead of me to do any good.

I would highly recommend a trip along this road if you ever get a chance and are not too “claustrophobic” – meaning the road can be very narrow (no shoulder) at some points. Another great thing about the road is that once you’re a couple of mile north of the start the traffic thins out to be almost non-existent and it’s just you, the road, and the beautiful scenery spread out all around you. So that’s pretty awesome.

The Taconic eventually ends at I-90, so I was forced to find another road to continue my northward travels. That turned out to be state route 22, which was a lazy two-lane roadway that wound up around the foothills of the Taconic Ridge and eventually led to the Taconic Trail, which climbed up and over the Ridge. I was fortunate to have a clear run the entire way up the mountain, zooming around turns and taking the short straight stretches up to 60mph, all the while soaking in the sights of the mountains surrounding me (as best I could of course – driving was priority numero uno!). I actually passed the sign that said “Welcome to Massachusetts” as I topped the ridge and started heading down. There was still snow on the ground, although the roadway was in fine shape, which lent to the scenery even more.

Mohawk Trail -> SR-8A

Mohawk Trail

Once over the Ridge and down into Massachusetts, it was on to the Mohawk Trail that winds along the northern mountains of the state. Again, more twisty mountain roads but what really made this part of the route stand out was when I entered Mohawk Trail State Forest and ended up on a sweeping road that wound right alongside what I believe is the Cold River, with mountains sloping up either side and evergreens shading the roadway. Even better was the river was really roaring thanks to all the melting going on up atop the mountains. Beautiful.

Eventually though, after the forest, the Mohawk Trail flattens out and becomes a bit less interesting from a driving perspective. Luckily there’s state route 8A that twists back up into the mountains, heading north for Vermont. This turned out to be a true mountain road, mainly consisting of a single paved road with no center line and many a treacherous corner to navigate. As you would expect, it was by and large deserted of any traffic whatsoever.  Obviously I didn’t want to go to Vermont, so I had to hop off 8A eventually to trek back south-east to hook up with the Mohawk Trail again – fortunately that road was just as twisty heading back down.

It was also interesting seeing some differences in rural lifestyle up in this part of the country. For example, instead of the normal white US Postal mail trucks I grew up with down here, they have regular cars with a yellow light with “US POST” lettering on them. The same deal for school buses – instead of the normal long (or even short) yellow bus, they have mini vans or SUVs that carry the school bus sign with lights atop their roofs like a taxicab! It all made sense for a low-density area that dealt with harsh winter conditions, but I guess I had never thought of that before. Of course you don’t want a 40-foot school bus navigating some of these roads.

Onwards to Boston

After returning to the Mohawk Trail via rt-112, it was a straight shot eastward along rt-2 to the outskirts of Boston wherein lived the friend I was staying with for the weekend. This was by and large the “boring highway” once again, but there was really no avoiding it at this point. I had had my fun and now it was time to bring the trip to a close. Rt-2 is a decent highway, a lot of it is 2-lane but every couple of miles it turns into a 4-lane (or one side gets and extra lane) so that slower traffic can be passed. There are also plenty of passing zones, which I used quite often to get an open road ahead of me. A minor detour around some highway construction didn’t delay me much at all. Also: apparently it’s a law to have your headlights on during the day. Good to know.

A funny anecdote

While driving back to my friend’s place from the convention center one night, I was getting all kinds of fucked up directions from the maps app in my iPhone. Having no idea why, I just followed them as best as I could, although several times it tried to lead me down a one-way street. I finally made that mistake turning after a stop sign and ended up staring at parked cars on both sides of the street facing me. So I go to pull over just as a city cop rounds the opposite corner. Fabulous!! Luckily the cops were cool about it and let me turn around with no problems. After that I pulled over for a closer inspection at these idiotic directions the maps app was giving me and I finally noticed it was set for foot travel, not car travel. /facepalm

Coming home (and why I watch the gas attendant)

Unfortunately the weather did not cooperate for my return trip, with lots of rain due to sweep into the northeast by Sunday night I made the decision to skip town that day rather than leave Monday morning like I originally planned. I also didn’t retrace my route up like I had hoped to – because what’s the point when you’re encumbered by inclement weather? So I hopped on the main arteries and was back in New Jersey in a little over 4 hours time (un-hassled by police again, thankfully). Dangerously low on fuel because I had wanted to get as close to the refineries and cheaper gas as possible, I pulled off the Turnpike at the first rest stop to gas up.

Now, I’m one of those drivers who always gets out of his car to watch the gas attendant (in NJ not only do we have full service, it’s actually against the law to self-serve) because it just generally makes them treat you and your car better. It also lets me prevent a distracted attendant (who is getting yelled at by some irate lady in a beat up Porsche packed with crap that makes it look like she just dumped her husband and moved out) from putting the wrong octane into my car, since their brain will default to regular gasoline.

Unfortunately, I didn’t stop him quick enough before he had pumped about half a gallon in, which meant he had to cancel the sale, which meant the pumps would no longer accept my credit card, which meant I had to use cash. Only problem was I had $5. But it would get me to the next rest stop, so I forked it over, got the meager amount of gas and sped off to the next rest stop a scant few miles down the Turnpike.

I pulled up behind an Audi R4 and watched as the attendant whipped the nozzle out of his tank without bothering to tap it out, splashing gas all over the guy’s rear quarter panel as he spun around to deposit the nozzle back in the pump. Now compare that with me, as I stand next to my car and watch as he takes the nozzle out of the pump, shakes all the excess gas still in it onto the ground on the other side of the pump, and then delicately inserts the nozzle to begin fueling.

The only problem? It was a Sunoco gas station. The last station I was at? Also a Sunoco. So when the pump refused to accept my credit card I had a pretty good idea why. After running into the rest stop to grab cash out of the ATM, I was finally able to fuel up enough to make it the rest of the way home.

Next trip: North Carolina

My next trip is next week, and will take me to Raleigh, North Carolina. I’m already looking into a great route down there, and once there I’ll be hanging with a GDNet buddy who drives a Porsche Boxster. Yea, we’ll be having some fun 🙂 Stay tuned for details from that trip in the week that follows!

→ 1 CommentTags:··

Cali-for-nigh-ay!

March 20th, 2010 · Personal

California 2010

So I had a pretty great weekend prior to GDC this year, thanks to having to take a trip up to Sonoma to visit my family out on the west coast. I have 4 cousins, an aunt and an uncle all living around the San Fran area and usually one of them picks me up in the city and takes me to wherever we need to go to meet up for dinner. This time however no one was able to make the trip down, and my cousin Emilie is actually pregnant (and due to pop very soon) so it was suggested I rent a car and drive up to Sonoma to meet with everyone for dinner and to see Emi and Kip’s new home in the hills.

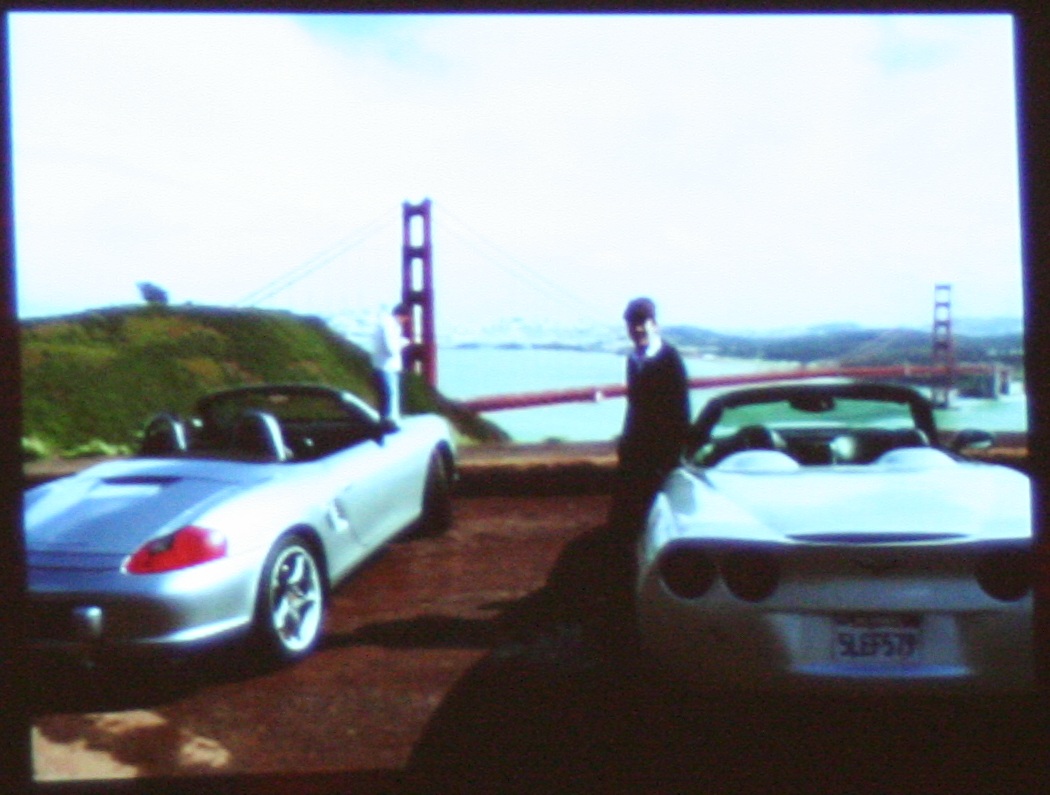
Well, I had never rented a car before so of course it wasn’t something I wanted to be bothered with, but then I thought of a picture I saw from a slide show Introversion’ s Mark Morris and Tom Arundel gave at GDC 2007 on their success after Darwinia won the Seumas McNally Grand Prize at the IGF Awards. They told the audience how they blew so much money on fast cars and hot girls. Here’s the picture:

That got me to thinking about how I could actually turn this to my great advantage. So I started researching into sport rental cars, and came across several options:

Exclusive Car Rentals
Dream Car Rentals
City Rent-a-Car

However all required an actual credit card to place a deposit and rent the car, and I have a Visa check card. Plus, this was all within a week of leaving, so I was stressed out enough as it without having to add an exotic car rental on top of everything. So unfortunately I had to shelve the idea of a sports car this year. My goal next year is to rent a Lotus Elise. If I can’t get that, then my next best car would be a Porsche Boxter 6S. If I can’t get that, I’ll settle for a Pontiac Solstice. Otherwise – MEGA SAD FACE. Let me clarify my car choices though: For one, I need it to be a convertible. I’ve never driven in a convertible and the weather around this time of year in SF is usually suitable for one, so might as well take advantage (although GDC next year is two week earlier :/). Next, it can’t be a monster of a car, which is why baby Ferraris are off the list. It’s not that I fear the power, it would just be useless on the roads I travel. Finally it should be a manual transmission.

California 2010

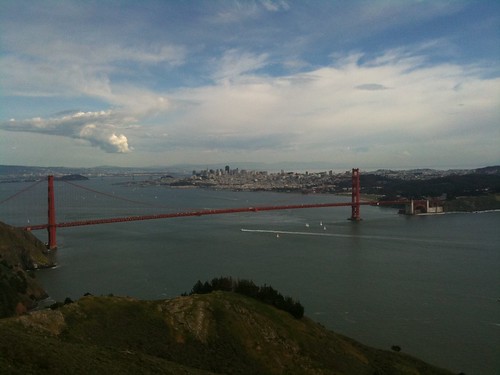
So I ended up booking through Hertz, which had a pickup spot at the Marriott hotel directly across the street where I was staying, and getting a Pontiac G6 to drive around in. FWD, automatic tranny – blargh. But I made do. I got to drive over the Golden Gate Bridge and up into the Marin Headlands, which is something I’ve been telling myself I was going to do for years. After tackling the awesome windy roads up there I started planning how best to get to Emi’s house using Streets & Trips on my laptop, which has a built-in GPS receiver. As soon as I laid eyes on Rt-1 I knew that was the way I needed to go! Luckily time-wise things worked out according to the GPS estimate, so I locked in the route and took off. Here’s an abbreviated version (on both ends)

In a word? Breathtaking. You go from town to forest to sea cliff side to bay side back to forest – all while twisting around and around. I was literally turning the wheel lock to lock in a span of a few seconds to negotiate around some of these corners. Several could almost be deemed a switchback. As long as you don’t get held up by any slow or incapable drivers, you’re good to go. They have turnouts for slower people to move aside (otherwise there’s simply no way you can pass without breaking a double yellow and having the muscle to shoot by in less than 5 seconds due to the amount of corners) but people rarely use them, I found – despite riding the bumpers of several cars. Some did get out of the way though, others didn’t seem to care.

California 2010

I made it up to my cousin’s no problem, where I helped assemble the baby furniture my uncle brought over and we had home-made sushi for dinner. Yummalicious! It was so great to have everyone together that night (especially considering my aunt and uncle are divorced, and both my younger cousins are out of home at school). I look forward to seeing my newest cousin very soon!

Coming back to the city the next day, I had to pick up Colin (furthest in the right in pic above) in San Rafael to drive him to the train station and ended up having to back-track a bit to catch Rt-1, but I picked it up well before the amazing coastal cliffs section and was actually able to run the entire length of that section completely unobstructed by traffic. It was quite fabulous!

Hopefully next year I get to rent a sports car and really upgrade the whole experience!

→ 2 CommentsTags:··