Blade Edge

Computer software | Video production | My life in general

Blade Edge main header

Flight Log – Manhattan Heli – Success!

September 6th, 2010 · Gaming

After my last attempt to pilot a helicopter around Manhattan ended with me in the Hudson due to an engine failure, I decided it was time to try again. That, and it was a beautiful day out and I had some time where I knew I (probably, most likely) wouldn’t be interrupted. So I got everything set up and logged into VATSIM. Now, flying VFR in a helicopter doesn’t really give me much of a reason to bother with VATSIM. But, along my route I would be entering within 6mi of La Guardia, which is where their Class B airspace hits the floor, which means I’m required to contact the tower even though I’m just passing through. So I was hoping KLGA tower would be staffed – it wasn’t. But oh well, maybe it would be at some point during the flight.

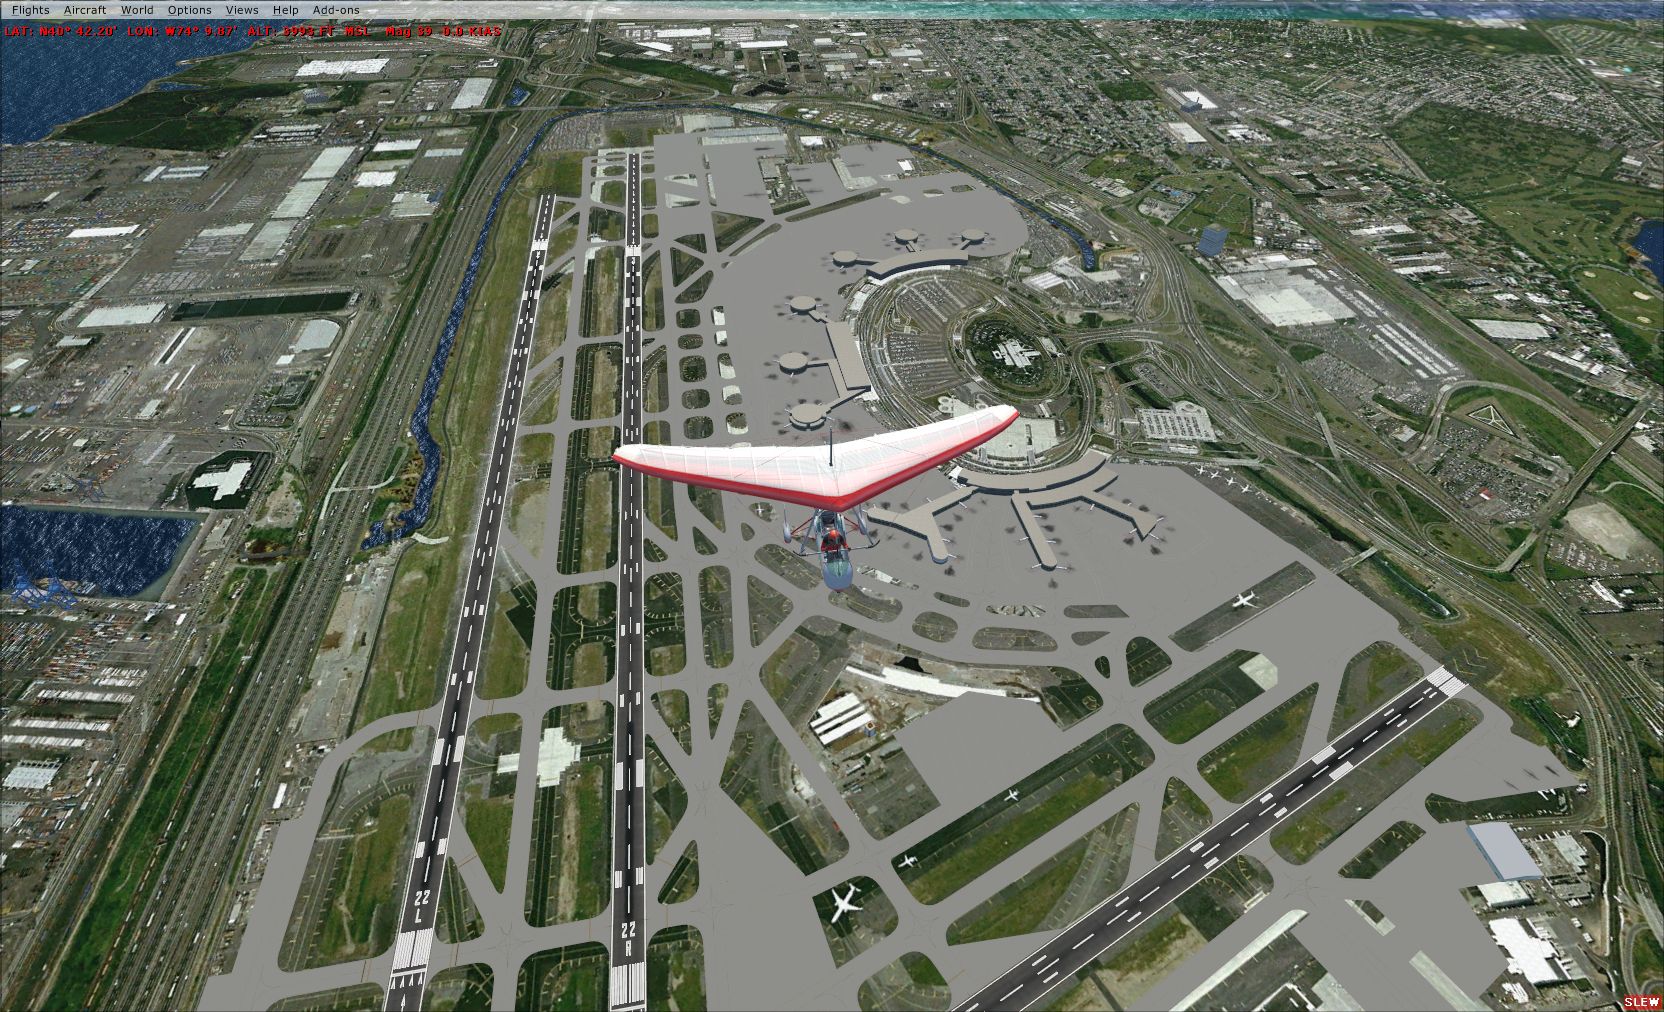
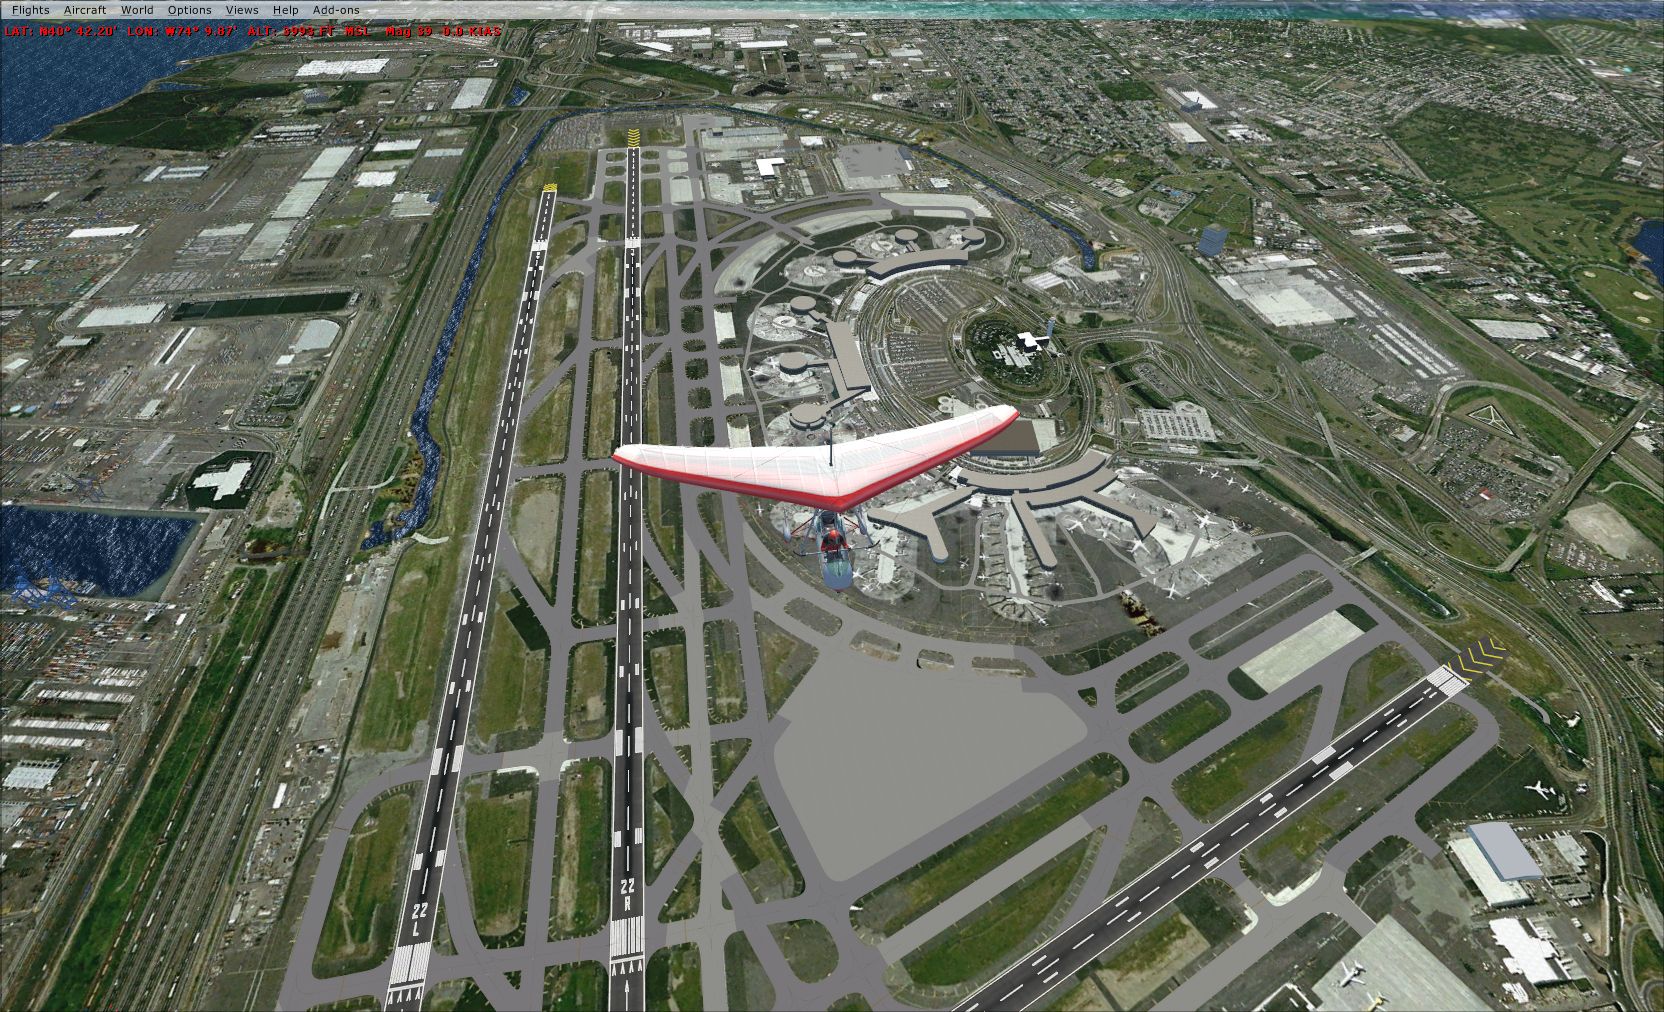
So I took off from KTEB and started out much as I did last time. If you reference the Heli Chart for the NYC area, I planned to fly the same route I attempted before, which was Echo to the Hudson and then back up the Hudson after looping around The Lady to cross over at Central Park and then down the East River to land at the Downtown Manhattan Heliport on Wall Street (KJRB). Flying along, I began to get a better sense of how I was controlling the helicopter. Unlike a plane, where speed is primarily controlled by throttle, in a helicopter it’s primarily controlled by the pitch. You only increase the throttle because tilting farther forward to go faster means you lose altitude. Likewise, tilting back to slow down you only have to back off the throttle to prevent from rising. It’s all a bit different and takes some getting used to, especially since there’s no real “cruise” mode where you can sort of sit back and let the craft fly itself. Although I can grip the stick lightly with just my fingers while flying along steady, I can’t ever completely let go. The throttle is a bit more lenient since, as I said, I can control my speed and altitude with the stick alone if I need to for short periods of time while flying – but forget while maneuvering or landing/taking off.

Coming down the Hudson I hit my first snag, which made itself apparent when I tuned to the general VFR frequency used by craft flying up or down the Hudson River. This frequency is for pilots to announce their position and intent so others know who else is out there. Unfortunately, VATSIM treats this general frequency like it does the main aviation general frequency and limits it to text-only transmissions. This is turn limits me to typing with one hand – lefty. So yea, rather awkward and requires more attention than I would like to give it. Luckily there is a hot key that lets me switch between the sim and text window so I don’t have to grab the mouse to select the text window to type out my transmission. But still.

So after looping around the Statue of Liberty and heading back up the Hudson, over Central Park and down the East River, I was ready to make my first real landing. I flew low over the heliport  to get the lay of the land, then swung back around to take her in. For all the nimbleness and responsive handling that makes the Robinson such a nice craft to fly for a beginner like myself, I noticed for the first time that, unlike the Jet Ranger, it has no viewports in the floor. This made things a bit more difficult, and I sort of just hovered around for a minute or so trying not to spin out and crash before I was finally able to bring it in line and set her down just short of the pad, but thankfully not in the water considering that this heliport is on a pier.

Inspired by my success, I decided to open a new flight plan and partially retrace my route to go back to KTEB. This time, I chose to fly up the East River, along the Hudson River, back down the Hudson, but halfway I would turn inland to follow I-95 along Route Sierra to swing over the Meadowlands sports complex (home of Giants Stadium) before landing just north at KTEB. Along the way I passed notable landmarks like the Brooklyn Bridge and Yankee Stadium. I also spotted another helicopter flying along the East River headed for KLGA. Luckily I spotted him before we ever came close, because he never broadcasted his position over the general East River frequency – but to be fair I realized then that neither had I.

I had a much easier time flying back to KTEB, becoming ever more familiar with how the helicopter handles in flight – banking without shearing my altitude, keeping level (obviously I’m pitched forward but I’m neither gaining or losing altitude) longer, and getting a better sense of how the throttle reacts – it’s very very touchy. I can nudge it a bit in either direction and watch my vertical speed indicator shift 500 feet/min in the same direction in an instant. Landing at KTEB was a bit easier, mainly because there was no water to worry about. However I did have parked aircraft nearby. Still, I managed to set her down off center but still on the pad.

As I powered down (again) and considered maybe making one more flight, I got a private transmission from the other helicopter pilot, who was pleased to see another chopper. We chatted a bit and I will have to shoot him an email to get some of his experiences flying helicopters on VATSIM. Again, even though we have limited interaction with ATC a lot since we fly mainly VFR, I know VATSIM controllers don’t deal with helicopters a lot, so I’m interested to see what the experience is like.

In the end, I decided I had the time (and the fuel) to make one last trip back into Manhattan, this time aiming for the West 30th St Heliport (KJRA). The other guy was also making a last flight, shuttling some passengers from KLGA over to 6N5, which was the heliport on 34th St pretty much right opposite the one I was going for. So we both knew we didn’t have to watch out for one another, but I still made sure to properly announce my positions this time as I traveled back down the Hudson towards Manhattan’s West Side – just in case.

Landing at West 30th took the longest, for no other reason than I still lack the experience. I just floundered around the general area for about 2 minutes before I was finally able to get low and slow enough to bring her all the way in. I almost took out a fence with my tail rotor tho! While I’m still white-knuckling the stick as I land, it’s definitely started to get easier once I make it to a certain point in the hover. The transition from flight to hover (and even vice versa to some extent) is still a touchy point for me, which is understandable given that’s a highly unstable flight profile.

Still, all in all I managed to take off and land three times without crashing, or landing so hard that I caused damage to my craft. I’m extremely pleased by this. I think the next time I take her out, I’ll go around for a closer look at some of the city’s many landmarks.

I’m still working with scenery too, by the way. I recently finished modifying the custom KTEB scenery I downloaded to add some new taxiways that were built recently so it now matches the current airport diagram. I will return to KEWR to finish that up as well. It takes a lot of time tho – even when I know what I’m doing. I have a much better appreciation for scenery designers now! I’ll most likely upload the improved KTEB scenery to AVSim once I get the original author’s permission and have him look it over to see if I screwed anything up in the process of upgrading it.

→ No CommentsTags:······

Flight Log – Messing with scenery

September 1st, 2010 · Gaming

I’ve been spending all my spare hours these past two days painstakingly re-creating KEWR to match my photo-realistic ground scenery textures, using a program called FSX Planner. It’s the first scenery manipulation I’ve ever done in Flight Simulator and I know there are a couple options out there to use when mucking about with airport and scenery files but this was the first one I came across when I went looking so I decided to start with it. I’ll be using a different program to modify another airport to see which one I end up liking the most. This program has a few quirks, and I can’t do things like drag-select or even ctrl-/shift-select multiple items to edit them at once, which is a bit annoying. Still, given that the documentation is pretty sucky overall (there are a few tutorials but no comprehensive manual, so a lot of property settings for objects I have to puzzle out on my own) I’m picking it up pretty quick.

The slowest part about it is that I need to make as many minor adjustments as I can, then recompile (which doesn’t take long) and then re-load the scenery data into FSX (which does take 2-3 minutes). Only then can I see how well things have lined up, and use that as reference to make further tweaks. While the program does make it easy for you to capture a shot of a location via Google Maps satellite view and use it as a background image, they forgot to take into account the fact that satellites don’t actually photograph image from directly above – at least, not all the time. Therefore when I loaded an image of EWR as a background although it aligned at first, the actual angle of the photo vs. my top-down view became readily apparent.

So in between going back and forth between sim and designer (I have FSX constantly running a window) and trying to figure out how to do some things as I build, things have been moving along a bit slowly, but are starting to pick up now that I’m understanding more. Here is what I’ve accomplished so far:

First, the default FSX scenery layout for KEWR:

Note how the runways align well, but the taxiways are all way off, which makes things look pretty cluttered from the air. There are also incorrectly-placed aprons for parking that overlap improper scenery areas.

Now, the improved KEWR with aligned taxiways:

Not only are the taxiways aligned here, but the runways are the appropriate length and are sporting blast pads at the ends just like in real life (if you look at the default photo again, you’ll notice them in the ground textures – look at the runway in the lower right). Also, you’ll notice a change in the coloration of the taxiways – as in real life some are asphalt and some are concrete. Also, the photo-real ground textures get to stick out more in between the better-looking but still obviously computer-generated taxiways.

There’s still plenty of work to be done, and more to learn. For example, I can’t access the terminal buildings to reposition them appropriately. Further, there are several scenery buildings that appear when the scenery is set above Normal that are incorrectly placed as well. Regardless, I still need to complete the parking aprons, and taxiways for airport traffic to run on. Then I need to clean up some of the taxi intersections and make sure the lighting all looks okay.

Luckily I have all weekend to work on this – with Hurricane Earl bearing down on us this weekend I don’t see myself doing much flying!!

→ No CommentsTags:····

Flight Log – VATSIM is a go

August 30th, 2010 · Gaming

My helicopter flight around Manhattan was done without the built-in simulator ATC because it wasn’t properly recognizing that I was in a helicopter. I said at the time I didn’t want to bother with VATSIM, but I quickly changed my mind when I realized I would end up using it sooner or later – so why not when I need it the most? To that end, I returned once again to good ol’ ground school – this time in the form of the VATSIM Pilot Resource Center, where I learned all the nuances associated with the VATSIM network, communicating with ATC, IFR and VFR procedures, filing a flight plan, etc etc. Fortunately most of it I either knew or had a general understanding of, which meant it didn’t take me long to work through the material. Flying on United Airlines I would always listen to the in-flight ATC chatter, and learned to recognize what people were saying, when and why.

Done with ground school, I then had to install and configure the add-on SquawkBox that would let me connect to the VATSIM network and communicate with the other pilots/controllers. That was quick and easy. Then I had to disable the Ultimate Traffic 2 AI traffic, since the VATSIM network would be showing me all the aircraft that were in my area (within 100mi). Finally, I had to set REX to pull down weather info off the VATSIM network instead of the real-world information site. VATSIM uses real-world weather too but it’s just a matter of syncing up with the same source.

I put myself in a Cessna 172 on the GA ramp at KTEB, where I was last based from. Ironically, when it came time to log into the server I had no idea what to do. SquawkBox didn’t have any default servers for me to connect to, and the VATSIM site didn’t provide me with any direct information on servers. Even their Quick Start guide left out any information on finding out what server to connect to. Finally I realized I could check the Servers tab on VATTASTIC to find the IP address of the eastern US server. Success!

First thing I did upon connecting was to tune my radio to one of the local frequencies. Both KEWR and KJFK were active, so I chose KEWR Ground. I then sat for about 5 minutes and practiced what I was going to say. I’ll admit it – I was way more intimidated than I thought I would be when it came to pushing that talk button – not because I didn’t know what to say, I didn’t want to sound like a complete idiot when I said it. Like:

“newark ground, cessna seven two uhhh… delta… uhm… november seven two… dammit…”

Yea, that’d be pretty embarrassing. Despite the fact that I remarked on my flight plan I was a total n00b, I didn’t want to sound like one. Plus, there’s that “controller voice” you can’t help but want to match on all transmissions. This says it best:

“Now the thing to understand about Center controllers was that whether they were talking to a rookie pilot in a Cessna or to Air Force One, they always spoke in the exact same, calm, deep, professional tone that made one feel important. I referred to it as the “Houston Center voice.” I have always felt that after years of seeing documentaries on this country’s space program and listening to the calm and distinct voice of the Houston controllers, that all other controllers since then wanted to sound like that and that they basically did. And it didn’t matter what sector of the country we would be flying in, it always seemed like the same guy was talking. Over the years that tone of voice had become somewhat of a comforting sound to pilots everywhere. Conversely, over the years, pilots always wanted to ensure that, when transmitting, they sounded like Chuck Yeager, or at least like John Wayne. Better to die than sound bad on the radios.”

You can read the full (and hilarious) real life short story I excerpted that from here.

So after a few minutes rehearsing and a couple deep breaths, I keyed the mic:

“newark ground, cessna seven delta sierra, request communications check.”

I let off the talk button and waited… and prayed. A few seconds later Ground came back:

“Cessna seven delta sierra, ground, reading you five by five. How am I coming to you?”

“reading you five by, ground. Thanks!”

“you betcha sir, no problem”

And so went my first ATC communications. If you were confused by my greeting, my tail number (and thus my callsign) is N727DS – which broken down means

N – the standard identifier for registered aircraft in the US
727 – my birth date, July 27th
DS – my initials, Drew Sikora

Since some aircraft registration numbers can be a mouthful, it’s customary to just use the last three digits/letters following your aircraft type when talking to ATC.

After making sure I was being heard okay by the controllers, I checked the VATTASTIC display to see if there was any traffic I could listen to, and saw two flights inbound to KJFK with another on the ground for departure. So I switched over to JKF tower frequency and listened in. One of the cool things is that the various chat programs actually simulate VHF broadcast, which means when people transmit it’s not like talking to someone over Skype. If you’ve ever listened to a real ATC stream, you’ll hear all kinds of distortion and static – well you get that here too. It’s incredibly surreal and immersive.

After a few minutes listening to JFK tower, I got tired of my engine noise in the background, so I shut down the engine for some peace and quiet while I listened. After several more minutes all of the sudden I got the “radio off” beep from SquawkBox and sat up, confused. I checked to make sure SquawkBox was still connected to the server, and it was. Then I looked at my radio stack in my cockpit to find it powered down. What the hell?? So I tried to restart the engine. Nothing happened. So I checked my voltage gauge and, sure enough, the dial was buried in the red. I had run down my battery.

Maybe this shit is just a little too realistic.

After I picked my head off the desk and made a mental note to be wary of battery levels in the future, I decided to log off completely – my mission for tonight, which was to log in, establish ATC communication and then monitor, was accomplished. Now everything is set up for a real flight down the Hudson in a Robinson. I will hopefully be pulling that off sometime this week, without making a complete ass of myself over ATC. Wish me luck!!

→ 2 CommentsTags:······

Flight Log – Manhattan Heli… Splash!

August 29th, 2010 · Gaming

This morning I was up early again and had some time to kill before the day’s planned activities, so I decided to hop into the Cessna 172 to fly up north to an airport that could give me a chopper to take over Manhattan later on in the day. Consulting Sky Vector, I found that Teterboro (KTEB) has a helipad, which was my first choice to begin with even before I checked. So yey!

KBLM to KTEB

Before loading up the flight though, I rustled through my scenery library and pulled out some KTEB custom scenery I had downloaded to install first. Well… that didn’t go so well. I still don’t know what I was doing wrong but I couldn’t get FSX to recognize the scenery files at all. I will need to look more into that. For this flight I just shrugged and went with the generic but passable default airport scenery (just like at KBLM).

I filed an IFR flight plan just to get some practice with ATC guiding me through the Class B airspace to the airport. Departure from KBLM was a little rough – my left rudder pedal brake got jammed on and I kinda swerved off the runway during my take off roll. Erm. Ooops. Luckily while there were other aircraft at the airport, none of them were taxiing at the time. So I technically took off from the grass but then climbed and headed out no problem. I guess I could have aborted the take off since it was early in my roll but… oh what the hell I didn’t crash did I?? Okay then. Any take off that leaves the ground is a good take off, dammit.

So ATC guided me up north, telling me to stick to 2500′ and 340° heading, blah blah blah. They gave me a couple of seemingly random direction changes and then when they instructed me to change frequency, the ATC window wouldn’t give me any options to respond. After 4 tries to contact me and getting no response, they canceled my flight plan and told me to get the hell off their frequency and back to general. So I thought my radio had broke – until I contacted Teterboro tower to request landing clearance. They came back fine and told me to make straight in for Runway 6 visual approach.

Errrr… okay. I was all ready to intercept an ILS glide slope, not make a visual approach. I was just passing KEWR so I hastily consulted the sectional chart on my laptop (aka “flight computer” eh? eh?) for visual navigation aids and found that following a river running just north of KEWR would let me intercept the Runway 6 glide path at a nice 45 deegree(ish) angle. ATC radioed in to tell me I was cleared to land, so I continued to follow the river until I had the airport in sight, then took her in for a landing. I came way short – barely crossed the runway threshold before setting her down – and I think I might have buckled the landing gear a bit too… but, any landing you can walk away from is a good landing, dammit.

Of course then I got completely lost trying to taxi to my parking spot despite having an APD open and ready. Maybe the taxiways in the game weren’t the same as in the real-life APD? I might have to fix that. It didn’t help the taxiways were only labeled at the runway intersections either. Finally I just turned on the progressive taxi (the game’s equivalent of asking ATC to guide you like a little kid) to make it to my parking spot so I could shut down. Stressful flight!

Back to ground school

Later in the day I sat down for about an hour or two of ground school to get myself back up to speed on helicopters. If you don’t know, helicopters are pretty insane flying machines. They are inherently unstable beasts that require more attention than an airplane – we’re talking constant control adjustments to pitch, yaw, roll and throttle. So after going over some great resource material at Hover Control, I sat down to actually plot out my Manhattan flight. Remember – I’m working hard to keep things real and actually learn more about flying than just how to handle an aircraft. Therefore, my next task was to figure out how the hell to understand this helicopter chart.

Like any aeronautical chart, it’s layered with what appears to be more information than is possible to process at once. It really is amazing that people in actual cockpits can reference these things – but I suppose it comes with practice just like anything else. While I tried finding instructional material on the internet without much success, I remembered that – duh! – the Manhattan scenery came with a user guide, which gave me all the info I needed, coupled with the chart’s Legend, to figure it out.

In the process, I learned that in my earlier flight along Manhattan, I broke quite a few laws, although I did get some things right, like staying to the right side of the East River as I flew by Manhattan instead of the left (think of the rivers as streets for aircraft. South-bound stays to the west side, north-bound to the east side). Mainly the laws I broke were height related, along with failure to properly announce my location and contact certain airports when entering their airspace. Luckily for me, the FAA is pretty lenient in this world. (And by “pretty lenient” I of course mean nonexistent).

Anywhoo, if you’ll reference the chart you can see the route I planned to follow, which was a departure from KTEB along the Echo Route to the GWB, catching the Hudson River route south to The Lady (Statue of Liberty), then hopping over to the north-bound Hudson River route, cutting across Central Park and then south-bound along the East River route to the Downtown Manhattan/Wall Street heliport (KJRB).

Manhattan tour

By the time I finished ground schooling, planned my route, and dusted off and set up my HOTAS, the sun had already dipped below the horizon and full night was just beginning. I had hoped to fly around in the day and land at dusk, but… oh well. Sitting on the pad I contacted the Teterboro tower to request takeoff clearance – and they told me to taxi to Runway 19. Well, so much for bothering to simulate ATC on this flight! (technically, you can “ground taxi” by flying low and slow along the ground. I dunno if the game’s ATC knew I was in a heli and wanted me to ground taxi, or was just giving me plane flight directions. I decided the latter). Still not ready to deal with VATSIM though.

Upon take off I tried to practice a little bit of hovering – and of course nearly spun into the ground flying backwards. Screw that. I pushed up the throttle to transition into proper flight and decided I can practice hovering later. I kind of steered the heli in the general direction I was suppose to be going, all the while giving people on the ground the impression that some drunk guy who didn’t know how to fly had stolen a helicopter. But I managed to find what I figured had to be Route 80 snaking it’s way east and following it I soon came to the George Washington Bridge. Checking to make sure I was below 1,100′ like I was supposed to be, I hung a hard right and started down the Hudson. Luckily this little heli can’t go anywhere near the maximum 140kts airspeed in this area, so I didn’t have to worry about that.

I did, however have to worry about crashing into the ground, as I fought to attain stable flight. About halfway down the Hudson I finally achieved a sense of equilibrium before I ended up a mess of spare parts (both human and mechanical) strewn upon the earth. Had I been still simulating ATC, I would have by now also tuned to the Hudson River general frequency and reported myself passing noticeable landmarks like the Holland Tunnel ventilator towers. Again tho – trying not to crash.

I approached The Lady and managed to descend and stay under the 500′ ceiling mandated in the area. I did a close fly by as I banked back north past Governer’s Island towards downtown to begin my loop around Manhattan. Just after I passed Ground Zero (I could see the construction cranes working on the Freedom Tower), I noticed a lack of RPMs. This is bad. I opened up the throttle all the way and staved of descent for a few seconds, but then I began to autorotate as I fell towards the Hudson.

SPLASH!!!!

Luckily rescue crews were quick to respond to my little disaster. I’m sure it will be on the news tomorrow.

“DRUNK MAN STEALS HELICOPTER, CRASHES IT IN HUDSON RIVER – STORY AT ELEVEN!!!!!”

Hover practice

I decided afterwards to go back to Teterboro and practice some hovering, and spent about 15 minutes just trying to keep the damn helicopter in one spot. By the end, I was able to at least keep it over the helipad, if not perfectly stationary (and I will also admit the helipad is actually pretty damn big). I even practiced a few small loops around the airport and landing again – although one of my landings was so hard that after I bounced back down to the ground, my engine completely died. And I was just thinking after surviving that landing how tough they had built this thing…

Heli crashed, computer didn’t!

One good thing was that I didn’t experience any issues with my PC locking up due to heat, most likely since I took measures to ensure better airflow through my case. Although I tried my best to tweak my graphics settings, I couldn’t bump the framerate any higher than 10FPS – which, actually didn’t seem to be so bad flying around with. I’ll continue to experiment to see if I can squeeze out some more frames. Hopefully my next flight over the city will end better. I suppose crashing into a heliport instead of the Hudson could be considered better… somehow…

→ No CommentsTags:······

DIY suspended 5.25″ hard drive rack

August 28th, 2010 · Personal

I was flying around in Flight Simulator X this morning when my screen turned into vertical bars as my graphics card completely seized up due to heat. It’s a problem I’ve encountered before on hot summer days after a few hours of playing games, but never in such a short time – less than 2 hours. I put my hand on top of my computer case and it was warm to the touch, which is saying a lot for a case made entirely out of aluminum and three empty drive bays up top. All that heat had to be coming from somewhere, and my obvious suspects were my hard drives and graphics cards. It didn’t help matters that all 4 of my hard drive bays were full, which literally jammed one of the hard drives right up against my Radeon HD5870, which is so long that with the 4th hard drive installed my motherboard tray could only close to about an inch of flush with the back of my case. I had hoped this wouldn’t be a problem but, not really surprising, it turned out to be.

My case is air cooled, because there really isn’t a lot of room inside of it to run all the hoses and heatsinks even if I wanted to water cool it – and I wasn’t about to take that pricey step (I would need a new case too!) without trying to clear up the airflow issues first. Now, I have two 80mm front fans to suck in air to blow over the hard drives. Problem is, once it gets past the hard drives to the graphics cards (I also have an HD8770) it’s already very warm, which means the hot air the graphics card is exhausting out the back is only being replaced with hot air. So I had to remove the two middle hard drives to clear up some decent cool airflow. Problem #1: I already said all 4 hard drive bays were full. A floppy drive and a multi-disc reader occupied the two external 3.5″ bays. That left the three open 5.25″ bays up top. Problem #2: How do you mount a 3.5″ drive into a 5.25″ bay?

Well, I suppose the easy way would be to buy something like this. Cheap and easy right? Well, if you feel like waiting a few days for your order to arrive or go hunting around for mom & pop shops that carry something like it. I was too impatient to wait and to lazy to go hunting around the area (and I’m cheap). That left me with whatever I could scrounge together around my house. After a few failed ideas, my gaze fell upon a DVD drive I had just pulled out of my rig because it had died. Inspiration struck.

I began by removing the front bezel. These things are designed to come off, but you’re gutting this drive so rip it off by whatever means necessary. Note, this is actually the second drive I gutted, not the first, which was a more modern DVD/CD drive.

Next, flip over the drive and remove the four screws on the bottom. Both drives were assembled this way, so I’m assuming most are. If you have a different sort of construction – you’re on your own! The important thing here though is to save the screws! You will definitely need these four later, and you might need any more you remove as well even if you don’t know it yet.

These four screws might be the only thing holding the drive to the enclosure, and you can pry it out. The first drive I dismantled required me to unscrew a back plate as well. It also had part of the spindle in the enclosure. If that’s the case, simply use the screwdriver butt to bang it out from the inside – it won’t take much. You can discard the drive how you see fit – I would recommend recycling, of course.

Now, take the drive face up like it is in the picture and insert it into your 5.25″ bay because this is the one snafu – you will be using the drive enclosure upside down, which means the screw holes may not match up. I suppose you could do this even before you decide it’s worth dismantling the drive. Either way, make sure you can actually mount the drive in its new orientation. If you’re using drive rails well… good for you 😛 I wish my case had em.

Before the next step you may need to do some shopping to get the zip ties pictured above. I’ve had a bundle I bought from Radio Shack like 5 years ago – they are pretty nifty! I don’t know where besides Radio Shack they are sold (or if they’re even sold there anymore) so you may have to hunt. Snip off the pointy end, then lay the drive across two of them lying parallel. Lift up one side at a time and use mounting screws to screw them against the drive itself, placing the screws through one of the many holes in the zip ties and making sure the bottom is taut. This will leave you with four strips sticking up over the drive.

Now just re-insert the 4 screws you removed from the optical drive but only screw them in about 1/4 of the way so they become posts. Then simply hook the zip ties over them, making sure that you use a hole that tightens (not too much) the zip tie so it suspends the drive properly. Snip off any remaining leftovers.

Here in this final image you can see the mounting screws on the drive holding the zip ties in place underneath, and then stretched over to the screw posts to suspend the drive.

Now comes the possibly tricky part of mounting them in your rig, depending on how the upside-down enclosures align with your case bay mounts. You may not be able to put your bay covers back on over them, and will be left with yawning gaps in your tower, as I did. But I decided to take advantage of that as well:

Remember when I said save all your screws just in case? Well the two you see holding the mesh on the bottom I had to fish out of the garbage! 😉 It was also by chance I mounted that drive on the bottom, not by design – which is good because I had no idea at first how to keep the screen attached at the bottom. To keep it wrapped around the top and sides, I unscrewed the front bezel so I could wrap the screen around behind it and screw it back down to hold it in – plus the removable case sides slide up against it and the bezel. I asked my mom if she had pantyhose as a first choice to keep animal fur (we have 4 dogs) and dust out, but she didn’t have any and, again, I was too impatient to wait to buy some (did I mention cheap?) so I salvaged a screen window, which has mesh fine enough to keep out the fur, at least.

Another tip: If you’re going to prevent front-access to your drives, hook them up to power and data cables before you do so – I forgot that since they are suspended and not directly mounted, there’s not much firmness there to push in plugs, and I didn’t want to push too hard for fear of over-stretching the zip ties. Luckily for me SATA cables are easier to attach than PATA.

Upon booting up my system (after saying “hold on to your butts!”) I bent down to look at the drives and saw no noticeable vibration in their cradles as they spun up.

I’ve not had a chance to re-evaluate my game performance, but the computer has been on for several hours already and the case is cold (not just cool, cold) to the touch, ambient temperature is at 77F. While there is no fan directly blowing air, I have opened up a lot of ventilation for the air being pushed around by my large ceiling fan. With the drives suspended rather than mounted, they are able to radiate heat off into the air and thus don’t require direct cooling.

I’ve already left myself a note to report back at the start of December with how the rig is running. If anything horrible happens before then (hard drive failure, zip tie snapping, still horrible gfx card overheating, etc) I’ll be reporting about it. But I have a feeling I’ll catch up with you all in December! 🙂

Update – April 2013

I’ve not had to touch or replace either of the two drives since I originally installed them!!

→ 1 CommentTags:··

Flight Log – Sunrise jaunt

August 28th, 2010 · Gaming

It’s been quite a while since I’ve logged any time flying. Mainly because I’ve been playing other games, also because after upgrading from XP to W7 late last year I never got around to fully getting FSX set back up and running. But now everything is back in working order again, finally – so I decided to hop in the Cessna for an early-morning flight.

Since the last time I’ve flown, I’ve upgraded my graphics card to a Radeon HD5870 and installed several commercial add-ons to boost the experience. They are:

As with last time, I’m still using MegaScenery Earth for my ground textures, except that I now have the entire New York/New Jersey/Long Island area around me. Also, I realized just the other day that since I now have two audio outputs thanks to the HDMI in the HD5800, I can set the ATC voice traffic to come through the HDMI into a set of headphones, while keeping all the environment sounds like the plane’s engine coming out of my PC speakers. Even more realistic!

Today was my first flight with all these products installed and running together, and things worked very well. Since I’m still at KBLM from my last flight, I started off at one of the parking areas and taxied out to the nearest runway, 21. I took off straight out and then lazily banked eastwards towards the shore and the sun just starting to peek over the horizon. I followed the shoreline northwards out past Sandy Hook and then continued on straight towards Manhattan, which popped up in all its glory… and slowed my machine down to 5FPS! 😛 But it was tolerable for simply flying over the city, which I did over the East River. I will be exploring Manhattan more in a helicopter at some later date.

After cruising over Manhattan with no problems, I decided to bank east over Long Island just as I was passing the George Washington Bridge. By now the sun was almost all the way over the horizon and I continued eastwards until New York Approach handed me off to the general frequency, at which point I decided to head back in towards KBLM. So, heading southwest over Long Island I did a pass straight over KJFK to check out the early morning air traffic at the terminals. There were several planes still boarding (it was only 6:30am) but the NY Approach channel was a lot busier now as I flew back over the bay towards Sandy Hook.

At this point my computer decided to go into heat lock 🙁 It seems that I have it working a bit too hard and it doesn’t seem to be doing a good job cooling itself. I probably have some pretty clogged fans and maybe even a few that just aren’t working anymore. I will need to disassemble the rig and make sure I have proper airflow so I can actually finish a flight that lasts longer than 1-2 hours :/

So, a bittersweet return to flying. Everything seems to be operating just fine – so as soon as I fix this heat issue I’ll be able to resume my flights around my local area. I still plan to slowly work my way outwards as I earn more flight time and get bored with the immediate area, but I do have several thousand square miles to play around in, so I should be happy for a while!

→ 1 CommentTags:····

On the death of Luke Skywalker

August 23rd, 2010 · Personal

Out of respect for other Star Wars EU readers, I’ve rendered some portions of this entry’s text invisible. Highlight to read, but be warned they contain major spoilers.

Okay, first things first – Luke Skywalker is not dead. Yet. However, he should die in this latest Star Wars book series Fate of the Jedi, and here are my thoughts on why.

It’s been common, for one thing, to kill off some major Star Wars characters in these multi-book series – in The New Jedi Order, we saw the deaths of Chewbacca and Anakin Solo. In the Legacy of the Force, we saw the demise of Jacen Solo and Mara Jade Skywalker. All four of these characters were major players in the Star Wars EU (Expanded Universe) with the exception of one, but everyone had great hopes and expectations for him, so his death struck a different chord in readers. Ever since NJO the EU has turned pretty dark, and the galaxy has become a much, much more dangerous place for our heroes. This is something I’ve long since enjoyed – I can finally turn pages again and actually feel suspense building as a character works through a tough situation, wondering if he or she (or it) will actually make it out alive.

So okay, important people die. But why Luke? Why now? I think this is the best time for him to go. With the galaxy the way that it is, with the impression so many people have of the Jedi the way it is, Luke’s own generation has passed its time already. He’s already practically gone into hermitage (albeit forced) on his quest to discover what turned Jacen Solo into the evil and twisted Darth Caedus. He’s pretty much in the end-stage of the Jedi life cycle.

Galactic politics aside, there’s also the spiritual journey that Luke is on, or has been on ever since he started piecing together the Unifying Force during the NJO. This is a journey he cannot continue without death. FotJ has already started to explore this netherworld of the Force, taking Luke and Ben and others “Beyond Shadows”. There, they spoke to a number of dead spirits trapped in a lake. You could consider them simple facsimiles of the beings they represented, filled with their last thoughts and emotions enough to talk to Luke and Ben in the manner that they did, or you could consider them the actual Force presences of those beings, walking through the afterlife. This, currently, has been left open to interpretation. I choose the latter.

This brings us to the still-as-yet unexplained phenomenon of the Force Ghost. Obi-Wan Kenobi was the first to appear as an apparition and talk to Luke, but we later learned that Obi-Wan’s former master, Qui-Gon Jin, was the first to actually learn of the technique  to communicate with living Force sensitives… from Beyond Shadows? That could certainly be a logical conclusion. Qui-Gon passed this knowledge on to Yoda, who then passed it on to Obi-Wan. We know the ancient Sith made much use of Force Ghosts to talk to people, perhaps they had an easier time of it considering the massive sink of Dark Side power that was present in the rift of the universe caused by Sinkhole Station in the Maw. During the struggle at Bakura, Obi-Wan contacted Luke one last time, saying he would no longer be able to speak to him from Beyond. This suggests a continuous journey for Force spirits after they pass on – they don’t just go to some place and stay there.

But let’s jump ahead a bit – almost a hundred years to be exact. Here we find Cade Skywalker, descendant of Kol Skywalker (descendant of Ben Skywalker? There is still a break in the lineage here) – and Cade is routinely seen talking to the Force Ghost of Luke Skywalker. Obviously, you say, Luke would have course been dead anyways by now due to old age, despite the fact that “60 is the new 40” as far as human life span in the Star Wars galaxy is concerned.

However Luke is a major hero of the Star Wars galaxy, and if history has anything to say about it, major heroes don’t just die of old age. Sure, that would be a great way for Luke to go, comfortable, surrounded by friends and loved ones – but that’s just not his destiny. He is and always has been a warrior, and as such he’s going to die for some greater cause. Spectacularly. Currently, FotJ is winding up for one hell of a punch – there have been 5 of 9 books published so far, and things are still building up. When it all finally lets loose, it’s going to be a Big Deal. Furthermore, the people in charge of EU publishing have said they’re not doing any more mega-series for the foreseeable future after this one.

Finally, the 8th novel in this series is titled “Ascension”. Now, that may refer to a number of things both within the FotJ storyline and the individual story (such as the rise of a new Jedi leader and/or the new Sith) but I’m hoping that it will primarily be a climax to the spiritual journey of Luke Skywalker.

I’ve been waiting and waiting for the EU to dabble more in this mystical realm of the Force, and I think I’m finally getting my wish fulfilled. And what better character to use in exploring this realm than Luke Skywalker? But of course, to do that he has to die. Fortunately, he won’t be gone forever.

→ 6 CommentsTags:·

Trip Report: Perseids Meteor Watching 2010

August 14th, 2010 · Personal

Success!! While sky conditions were not optimal, the trip was still well worth the effort, if only to give me a better idea of how to do things next year. I’ll break down the various aspects of it to make it easier to reference later (like, a year from now). If you have no idea what I’m talking about, educate yourself.

The Sky

The whole point to slogging up a mountain was to be under an amazing night sky – and Wakely Mountain delivered. I’ve been to the top of Mauna Kea and seen the sky there, and really the only difference I can make between the two is Mauna Kea is above 10,000 more feet of atmosphere than Wakely, which means less pesky clouds and haze. The Milky Way is clearly visible as a stream of soft white arcing over the sky. There are so many stars you really have to know your astronomy to pick out the individual constellations. Objects like M33 (The Andromeda Galaxy) are clearly visible to the naked eye even when you stare straight at them. Objects like Jupiter are almost offensive to look at because they are so bright.

For us this trip, we had to deal with thin high-altitude clouds the first night and lower, thicker patchy clouds the second night. The first night the sky would dim and brighten as the clouds moved about. Since it’s too dark to actually see them, you’ll slowly notice the Milky Way disappearing, then the stars will become dimmer and dimmer – it almost feels like you’re slowly losing your vision! The second night the effect was more immediate, and we could see these black, oily patches of sky moving about. It was very creepy – the sky is so lit up with stars that thick clouds are like black abscesses in the sky. Very sinister.

The first night, since the clouds were thinner, we were able to see 57 meteors between the both of us. The second, since when the clouds moved in you saw nothing (and this happened more often), we only caught 31. Still, all this was counted prior to the peak of the shower. Since the earth rotates in the direction of its orbit, as dawn approaches we’re driving more directly (from our point of view) into the dust cloud, left behind by comet Swift-Tuttle, that the Perseids come from. We had to stop watching at 3am both nights due to clouds and the best time for watching is 3am to sunrise. Plus, plenty of the meteors were rogues – random debris visible because it’s so dark out. Finally, there were plenty we didn’t see due to the fact that there is a treeline around the summit that blocks the horizon (not very tall) and with only two pairs of eyes, you can still miss plenty. At least 2-3 dozen “maybeors” were caught out of the corner of our eyes but we didn’t see enough to track and confirm it wasn’t just some trick of the light.

This is without a doubt the most accessible spot in the New England area to see this kind of night sky.

The Hike

It’s funny I should say “accessible” because a lot of people probably wouldn’t agree. I almost wouldn’t. The 3mi hike up Wakely Mountain begins with 2mi of easy trekking along a road. And by road I mean two shallow ruts in the ground. In fact, if you look on Google Maps, you can see they have the road charted down. The real hiking begins with a 1mi ascent up to the summit that includes the majority of the 1,600 foot climb to the final 3,766 foot summit. In fact if I were to guess, that one mile includes about 1,200 feet. That’s a lot of up!! To give you an idea of the trail up the mountain, here’s a picture. And when I say “fairly tame” I’m not kidding around – there are some sections that have large rocks eroded out from the ground (the trail is basically a wash from the summit where the water runs down) slanted at ~60 degree angles you have to clamber up. On average the trail up is probably a 45 degree slope.

While the hike to the base of the mountain took us about an hour, the hike up that last mile took about twice as long with around 5-6 stops to catch our breaths. It certainly didn’t help that we were hauling as much as 30lbs of gear! I’ve now learned that to hike in comfort and camp in comfort is a hard duo to achieve with equal success. I did not expect it to take us 3 hours to summit the mountain, so that’s something to keep in mind next time.

We managed to make it down the mountain and back to the trail head in half the time it took for us to get up.

The Surrounding Area

Unfortunately, the one mile trail up to the summit is the only way up or down. I was hoping (although I hadn’t found any indication on the Adirondack Park website) that there would be a trail or two leading off the summit elsewhere, but no luck. We hiked back down to the bottom of the main climb and spent the afternoon climbing along the rocks that made up a stream bed that eventually led back to the main trail, but other than that there’s not much to do – and then you have to climb back up to the summit again.

So, bring a book next year 😉

The Summit

While there is plenty of room at the summit for several tents to be pitched, everyone should have a bedroll because the majority of the ground is rocky. The fire tower is climbable and offers amazing 360 degree views of the surrounding mountains. While I did climb it at night as well, there’s really no point since the top has a roof on it. It’s solidly built with plenty of handrails to hold on to for your ascent/descent. There is a cabin where the park rangers on watch used to stay that had a latch but it has rusted and broken off. Inside there is a main room with enough space for 5-6 people on the floor, as well as another room with two cots. It is well insulated and stays warm at night – however you’ll have to get over the spooky factor of sleeping there at night 😉 Speaking of staying warm, there is a fire pit and ample amounts of fallen wood (it’s illegal to down live trees) with which to build a decent fire for cooking and warmth at night – it can get into the 40’s. Luckily since it’s so dark having a fire going won’t mess up the night sky at all.

The Drive

The roads up to the trail head are all great. The route I chose going up spanned three scenic US roads, and coming home we hit a fourth. Also, since it was such a nice day driving home I decided to take the Taconic Parkway back south instead of staying on I-87. The main concern I had going up was the fact that I knew at some point the final road to the trail head turned into dirt, but I could not determine the condition of the road. In my sports car, it could have meant an end to the trip after 6 hours of driving! But I gambled it wouldn’t be that bad and it wasn’t. Four miles long, the biggest concern while driving on it for a car like mine was clearance, but there weren’t any rocks in the road big enough to cause problems. After that, it was just taking it slow so I didn’t get a flat tire from the rocks that were sticking up out of the ground. Some sections I could get up to 20mph. No doubt many people were a bit flabbergasted at seeing my car on that road!! In fact, while driving out one park ranger stopped his truck heading in the opposite direction to ask if we had really made it all the way in.

Next Year

It is most definitely on for 2011! Hopefully conditions will be better and more people will be able to tag along. To that end, I have scheduled two separate trips. Although the shower peak is on a Fri and Sat morning next year, which means we would have to leave Thurs, given the fact that the sky is so dark peak times don’t matter too much we could also go Fri-Sun. We’d only get one day of peak activity, but the next day will still produce some meteors as well. I’ve created two Facebook events. Whichever gets the most people will win.

Perseids Meteor Shower Watching 2011 – Thurs,Fri,Sat
Perseids Meteor Shower Watching 2011 – Fri,Sat,Sun

Here’s looking to 2011!!

→ 10 CommentsTags:···

Perseid Trip is a Go!

August 10th, 2010 · Personal

Off to the Adirondacks!

As I planned last month, I’ll be making a trip north to the Adirondack State Park in New York starting tomorrow morning. Unfortunately only one of my friends is able to come, and the weather doesn’t plan on fully cooperating, but given that I plan to make this an annual trip, going up this first year regardless of meteorological conditions is necessary to at least get an idea of what is up there and if this location is indeed suitable for a return trip (hopefully with more people and better conditions) next year.

Speaking of next year, the trip will move closer to the weekend and in 2012 will even fall mostly on the weekend. I also had not considered until now that I really don’t have to schedule the trip to coincide with the shower’s peak schedule – this location is so dark that even going within a week prior to the peak if the shower can produce good results in terms of the amount of meteors seen. I will be sure to keep this in mind next time the peak arrives during the work week.

I will, of course, post a full report upon my return.

Aren’t going? You can still watch!

Don’t worry if you’re not able to make it up to the mountains with me this year. Being stuck in the suburbs doesn’t mean you still can’t catch sight of some Perseids! The storm is expected to be rather good this year, so if you don’t mind waking up early or staying up late, you can still enjoy the show. Here are some important things to remember:

  • Peak viewing times are from 3am until dawn, your local time – this is when the earth is driving straight into the dust cloud. However you can start looking as early as midnight if you’re staying up late rather than waking up early.
  • If you have lots of tall trees nearby, you might want to wait until 3-4am regardless because that’s when the constellation Perseus is high enough in the sky to make more meteors visible above the tree line (or you can do what I do and sit out on your roof earlier in the night)
  • The amount of light pollution will dictate how many meteors per hour you see. Here is the light pollution map for New Jersey, centered on my area. You can get others from this site as well to match wherever you are. I live in a red area, and I can see about 6-8 meteors per hour on a clear night. The numbers will decrease drastically from there the brighter it gets, so keep that in mind. If you live in a white area and can get to a red or better (green, yellow) it would be worth doing so.
  • As always, don’t forget to review my Meteor Watching Tips to make sure you get the best experience possible.

Good luck! I hope you enjoy the show and that conditions in your area are suitable for doing so.

→ 1 CommentTags:···

Adirondacks Perseids Meteor Watching Trip

July 14th, 2010 · Personal

I’ve been contemplating this for some time now and have finally researched out all the nitty gritty details to come up with an actual plan. The idea is to get out to some of the darkest sky in the entire northeastern region and experience a meteor shower like never before. This is similar to my trip out to the country-side of Canada to view the Leonids last year, but will be even more spectacular if the weather cooperates. My sky watching experience in Canada took me to skies twice as dark as my home area – this trip will take me to skies twice as dark as that.

The Perseids Meteor Shower

This meteor shower is one of the most reliable showers of the year. Other showers wax and wane or are just small to begin with but the Perseids are fairly consistent in their numbers, which can be as many as 50-80 meteors per hour during peak (which is when this trip is scheduled or course!). Too, these meteors tend to be very bright and long-lasting as they skim our atmosphere. I last wrote about this shower back in 2008 when I started blogging about my sky watches. I missed it last year due to bad weather.

This year, while no predictions have yet been made, it’s already looking good thanks to the fact that the moon sets shortly after the sun, meaning the skies will be as dark as possible by the time Perseus rises fully over the northeastern horizon just after midnight.

Destination: Wakely Mountain

Wakely Mountain is a 3,700 foot peak in the wild country of the Adirondack State Park. It includes a 3-mile hike to the summit, which is capped with a fire tower offering 360 views of the surrounding wilderness. Unfortunately, the fire tower wouldn’t be safe to climb at night, so we will have to find an area around the summit that offers us views of the horizon to the northeast. The hike is categorized as moderate to difficult thanks to a relatively steep ascent in the last mile of the trail to reach the summit.

This summit was chosen because it lies within a region of darkness classified as a 2 on the Bortle Dark-Sky Scale. Yea, that is pretty freaking dark!

You can download and overlay the regional dark-sky chart in Google Earth if you’d like to see the area we’ll be hiking in.

Travel Plans

8/11

The trip will embark on Wednesday around 10am. With stops for lunch/gas along the way and a travel time of around 6 hours, we should hit the base of the trail somewhere between 4-5pm. That will give us around 3-4 hours to hike the 3-mile trail to the summit and find a place to camp before sunset at around 8pm. The drive to Wakely will be a scenic one. We’ll be traveling on 3 scenic routes: The Taconic State Parkway, Rt. 10 and Indian Lake. Hence the 4hr normal drive along major arteries is extended to around 6. After we make camp and settle in, we can enjoy the first night of meteor watching as the peak begins the morning of the 12th.

8/12

Whenever people wake up (depending on when you go to sleep – the shower lasts until dawn) there are miles upon miles of wild countryside surrounding the peak that can be explored during the daytime. Once night falls again, the second night of the shower peak will arrive.

8/13

We’ll break camp as soon as everyone is awake and ready, and hike it back down to the parking lot to pick up our cars and head home. The trip will take around 5 hours – we’ll be sticking to major arteries almost the entire way home, but to get out of the park we’ll be driving down another scenic route to get to the nearest interstate. We’ll most likely be arriving back in the Lincroft area sometime in the early evening.

Here is the full route plan.

Weather Considerations

It should of course be noted that cloudy skies will not make for a great meteor watching experience. Granted, seeing the meteors is a very integral part of this trip, but there’s also the driving, hiking and camping to consider. Unless inclement weather is forecasted, or enough people going decide not to if seeing the meteor shower will be impossible due to sky conditions, the trip will be on regardless of cloud cover.

RSVP via Facebook

If you can make it, or think you can make it, RSVP on my Facebook event page. Or if you’re not on Facebook just send me an email to let me know.

Reference Links

For my planning use:

Wakely Mountain Clear Sky Chart
NOAA Weather Service Wakely Mountain Area
Adirondack Trail Conditions
Adirondack Backcountry Regulations

→ No CommentsTags:···